Topaz Labs Sharpen AI: Deep Learning Comes to the Rescue
7 Comments
How many times have you left a scene convinced that you got the photo “in the box”, only to find out upon looking at the file at 100% on the computer that it was unacceptably blurry? Some photographers advocate making generous use of the digital trash can when images are technically flawed. However, when images required travel to faraway locations or captured rare conditions, I was reluctant to do so. It turns out that with recent progress in AI-powered software, blurry images may be very usable after all. Find out in this article what a game changer Topaz Labs Sharpen AI is.
Focus blur correction
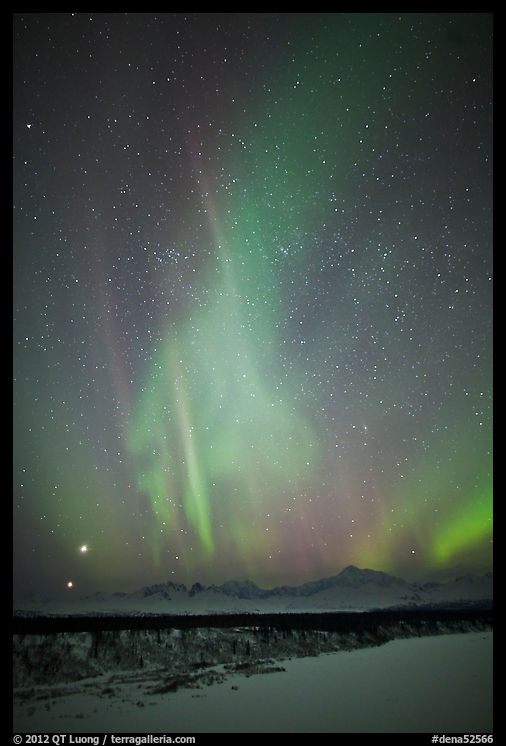
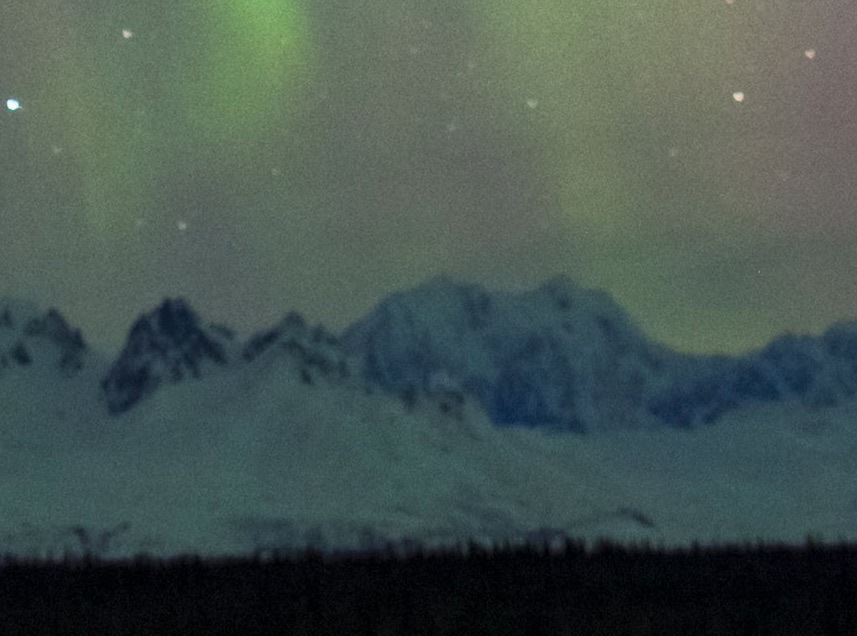
Almost 8 years ago, I spent two nights at the South Denali Viewpoint. This meant sleeping in the car in the double-digit subzero (F) temperatures typical of the Alaska winter. I was rewarded with the awesome sight of the northern lights dancing over Denali. Shortly prior to that trip, I had bought a second camera body, a Canon EOS 5Dmk2, to use as a backup and time-lapse camera. However, I failed to exactly duplicate all the custom settings of my main camera, and in particular to disable AF from the shutter button. I focused the camera at infinity using the back button and expected it to remain focussed that way. However, when I pressed the shutter button, the camera tried to re-focus, and in the process misfocused beyond infinity. One of the key lessons here is to review images in the field. It certainly took many instances of the issue before I got into the habit of checking out the file at 100% on camera for important images, and yet I still sometimes forget. Back home, I tried every existing software to try to fix the images without success. Although the focussing error may escape detection on a web-sized image or even in the time-lapse video, it certainly wouldn’t go unnoticed in print. Here is a 100% view of a portion of the original file, which was about 21 MP.
This failure haunted me for months, if not years. It’s hard enough to travel to the South Denali Viewpoint in winter and overnight there. That far south you also need to have high solar activity to see the aurora. Yet getting a second chance at photo stayed in the back of my mind despite concerns with carbon footprint. Shortly after Topaz Labs Sharpen AI was released, the first thing I did (notice the trial mode) was to try to run it on this image. With the default settings, the results showed artifacts that made the sky appear reticulated.
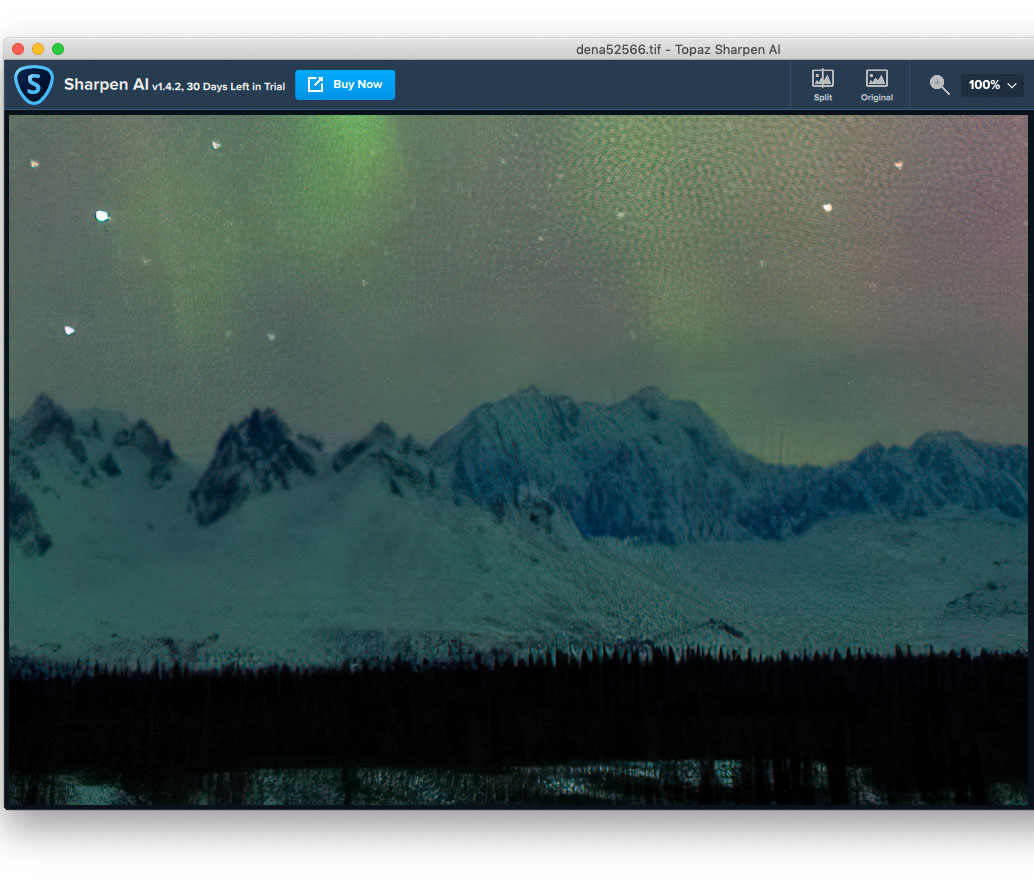
Yet parts of the image were much improved. Before giving up on another seemingly useless piece of software, I tried to play with the sliders. Reducing “Suppress Noise” to 0 only made things worse.
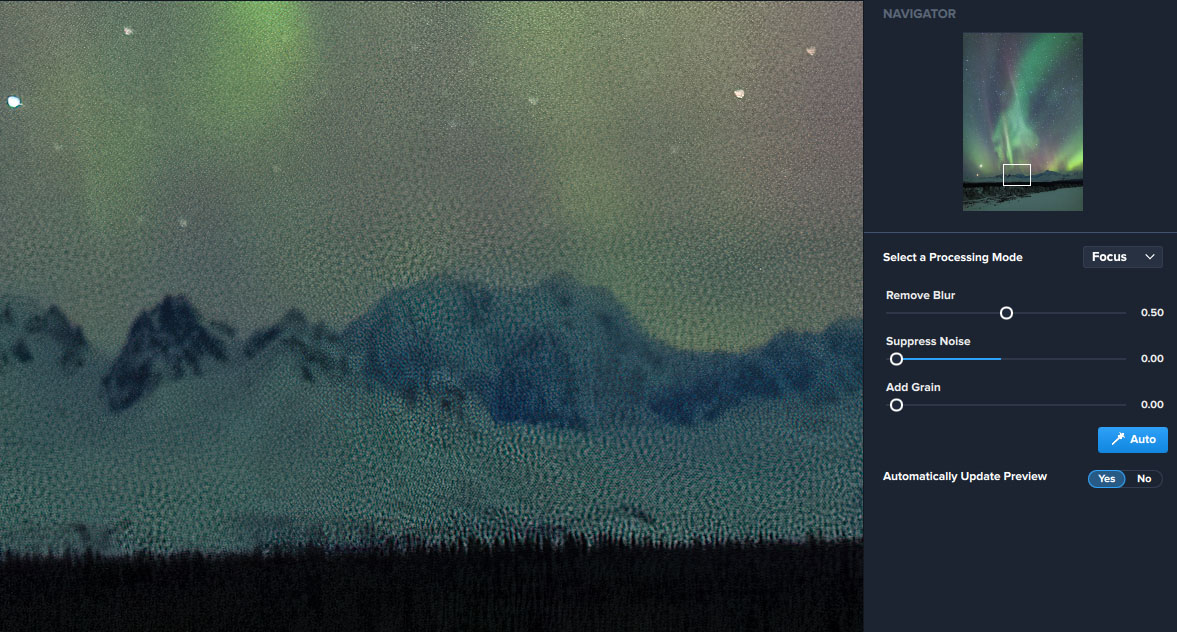
On the other hand, increasing “Suppress Noise” from its 50 default value to 75 yielded a notable improvement. Indeed, back in 2012, I had communicated with the author of a deblurring app, and he explained that what tricked it was that the image was shot at ISO 1600, which at that time was about the upper limit of usability for a Canon camera. He asserted that the resulting noise would make it impossible to estimate accurately the blur function for any algorithm. That was probably true in 2012, but that same year also marked the arrival in force of “deep learning” – more on that later.
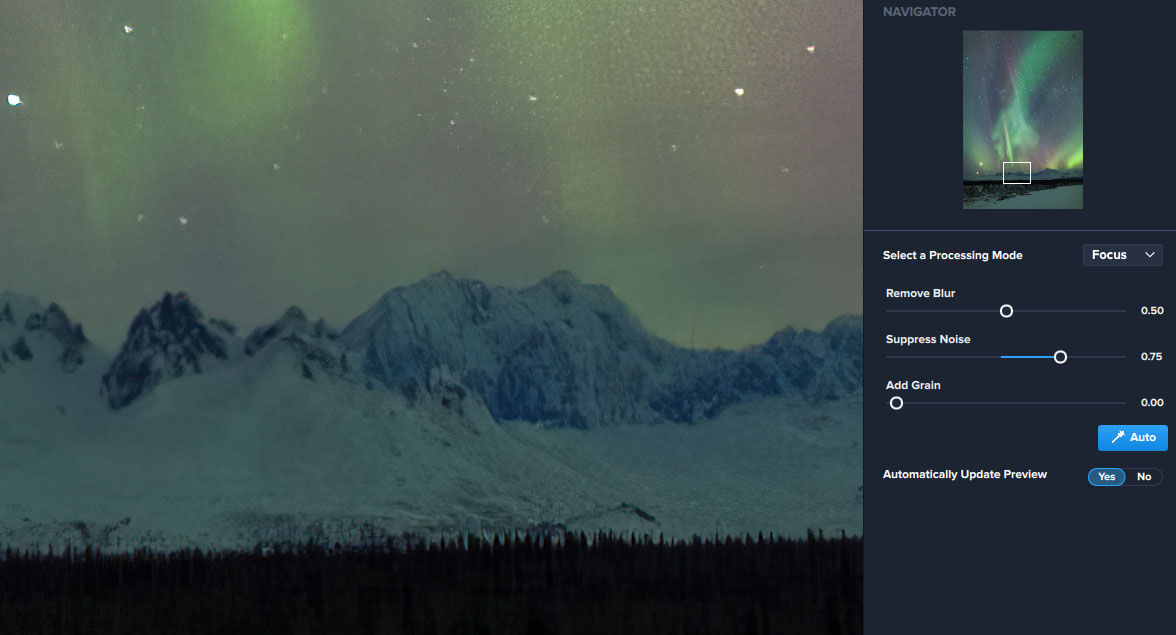
Although starting from Suppress Noise at 90, results were satisfying, I found the best to be obtained by pushing the slider all the way to 100, and then adding grain (0.25) to prevent the image from looking artificially smooth.
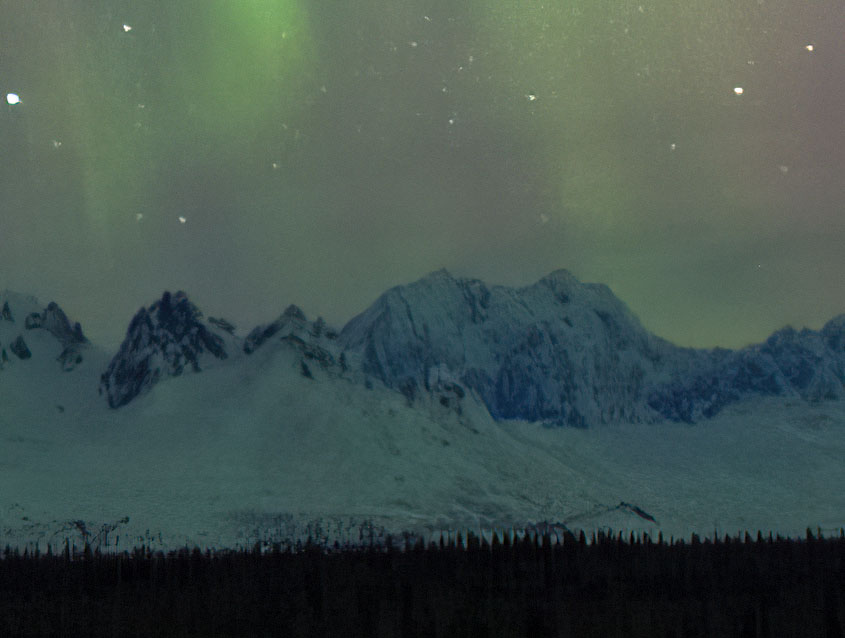
The defocusing has enlarged the stars, and although they now look better with their sharper outline, the processing is not able to fix them entirely. On the other hand, the mountain and treeline look excellent. The difference is almost magic. I promptly purchased a software license.
Camera motion correction
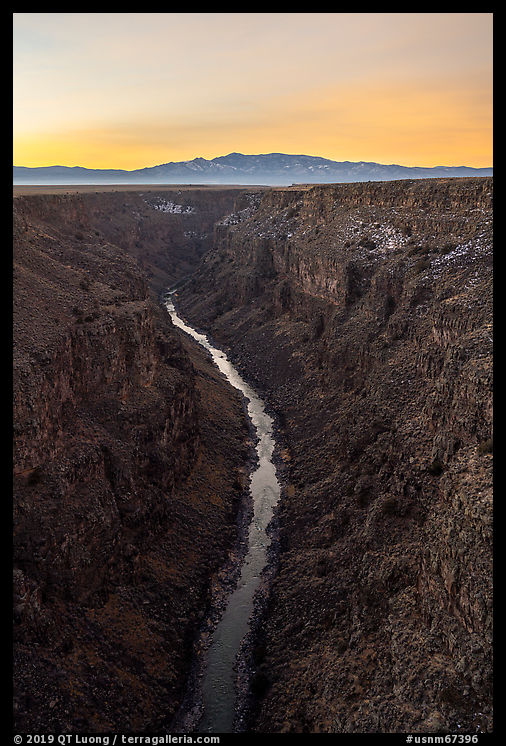
I mentioned in the previous post that when I stood on the Rio Grande Gorge Bridge, the winds were gusting, and I thought about camera shake. But it was also one of those fast-paced situations where you have other things to worry about. Landscape photography may at first appear as an endeavor where you have all the time in the world since your subjects do not move much, but even without taking into changes such as cloud motion, the light can change quickly, especially at both days ends. The sunrise colors that energize an overcast sky sometimes last only minutes. I was not only trying to check out views from both sides of the bridge but also walking along its length to find the best position relative to the river. In the heat of the moment, if that term is appropriate since I was also battling frozen fingers, I did not check the photos for 100% pixel sharpness before moving to the next spot. When I examined the images at home, as luck would have it, the composition with my preferred curve of the river was less than perfectly sharp. Here is a 100% view of a section of the original file, which is from a 60MP camera.
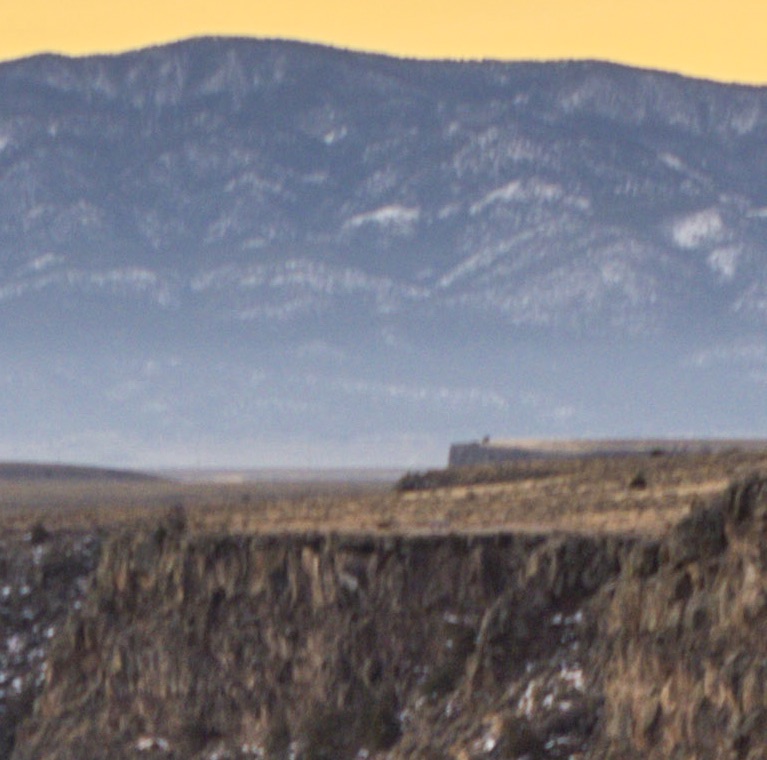
Sharpen AI controls are sparse. The most important is the choice of processing mode. A pull-down menu gives you the choice between Sharpen, Stabilize, and Focus. Sharpen is meant to apply ordinary sharpening, Stabilize to compensate for blur by camera motion, and Focus to compensate for blur caused by focussing errors. In addition, there are three additional sliders. Unlike with Focus, changing them over the default values generally does not result in any significant improvements with Stablize. Here is the result of applying Stabilize with the default parameters. I think you’ll agree that it is impressive.
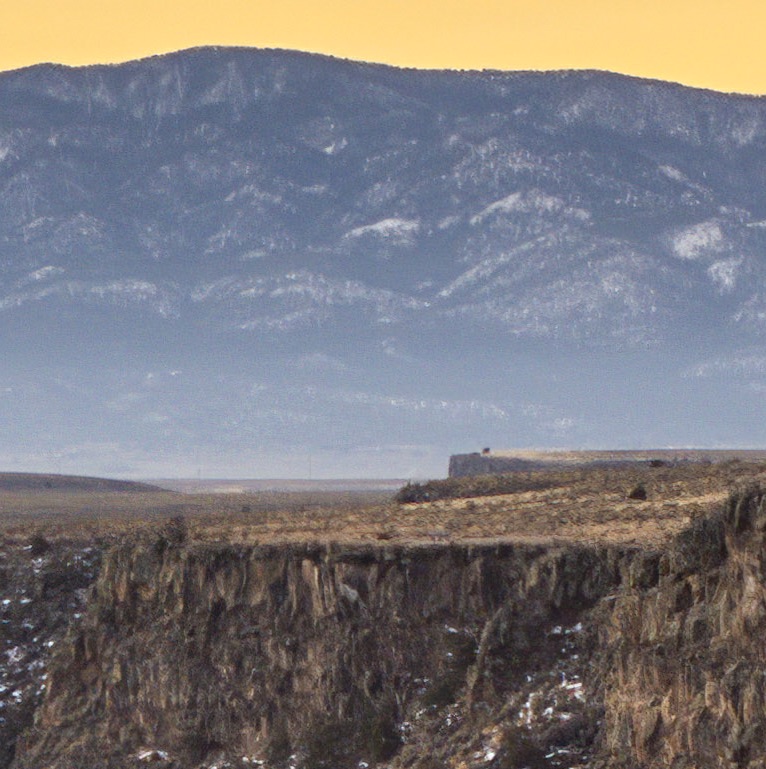
I have found that Sharpen doesn’t do much more than ordinary sharpening tools. While Focus sometimes goes “over the top”, creating details that look like artifacts, Stabilize consistently produce great results. You could run it on every one of your images, except for the fact that Topaz Labs Sharpen AI is very resource-intensive. On my Mac Pro, it takes up to a quarer of an hour to process an image, and during that time, it is one of the only rare apps that brings the machine to its knees, slowing down considerably any other apps running concurrently.
How does it work?
Debluring had been available for while in Photoshop (currently Filter > Sharpen > Shake Reduction) as well as standalone software. Both used a technique that seeks to calculate from the blurred image the transformation mapping the ideal image to the blurred image using pre-programmed sophisticated models and equations. Once that transformation is determined, then they apply its inverse to undo the blur. With real-world images the technique did not work well. The alternative approach is machine learning with multi-layered artificial neural networks, called “deep learning”. Instead of pre-programmed models, neural networks that use a structure inspired by the human brain are fed huge amounts of data and corresponding desired outcomes. By performing the task with massive numbers of repetitions they are able to “learn” by tweaking themselves a little to improve the outcome each time. The concept has been around for half a century, however starting from the early 2010s, practical advances facilitated by GPU-based computation and learning data availability became impressive enough that deep learning is now synonymous with Artificial Intelligence (a much larger field) in the eye of the public. It quickly made its way into consumer products, the most ubiquitous being the speech recognition and face recognition capabilities of smartphones. Recently, the technology tricked into image processing software, and Topaz Labs appears to be at the forefront of those developments.The way Sharpen AI works is basically to look at every element of the image, such as a tree or skyline, and try to replace it pixel-by-pixel with a sharper version. Based on CPU usage, I estimate that for each pixel, more than 50,000 operations are performed. The app is not applying a transformation to the image, but rather re-creating an entirely new image based on the input image. In some sense, the output is a graphically rendered image, rather than a photograph, and there is something uncomfortable about that. There are already plenty of great photographs around, that letting go of a mistake should be easy, but it’s not always the case because a particular photograph could achieve a particular useful purpose. Given unlimited resources, I would prefer to go back and re-create such a photograph and gain a new experience. However, my, and more importantly this planet’s resources are not unlimited, so I will settle for a compromise. Topaz Labs Sharpen AI made me glad I didn’t delete all of my blurred photos.


Thanks, QT, for a great article. I have lots of old scanned slides that this might help with, and thanks for your practical tips. Hopefully you are getting a new Mac Pro and this will be a heckuva lot faster!
Best
Paul
Unfortunately, Sharpen AI doesn’t work well on 35mm scans. While it does reduce blur, it also magnifies the grain considerably. I suppose the training data consisted only of digital images and at that point I don’t see anyone going into the expense of producing such data on film.
Topaz really has upped their game recently. These are some impressive results. Now I wonder how many images I deleted due to being the “ruthless” editor often recommended by so many articles. Certainly many of them could have been made usable.
Indeed. Topaz Labs GigaPixel AI is equally impressive, I might write an article about it too.
Thanks for this article. Very insightful. I had downloaded a trial of “Adobe Photoshop Camera” which uses some AI to dramatically alter your images: star trails, change to a jight photo with night sky, and other effects. It was a little scary how good even their beta was. It won’t make up for bad light or bad composition, but it wont be long before AI is used to help you make a better composition, too.
I have heard that Topaz DeNoise AI is even better. Have you compared it to Sharpen AI?
That would be an interesting comparison. I didn’t think of it. I did compare it with LR’s noise rreduction, and while sometimes slightly better, I did not find it to be a quantum leap unlike Sharpen AI vs Photoshop’s Shake Reduction.