Rio Grande Del Norte National Monument on Foot
Although I could always look for more, I needed just one image of Rio Grande Del Norte National Monument with autumn foliage, and being reasonably confident with the one I made, I could now turn to locations that had eluded me during my previous trip. Instead of roadside photography, they would require short hikes.
Taos Valley Overlook
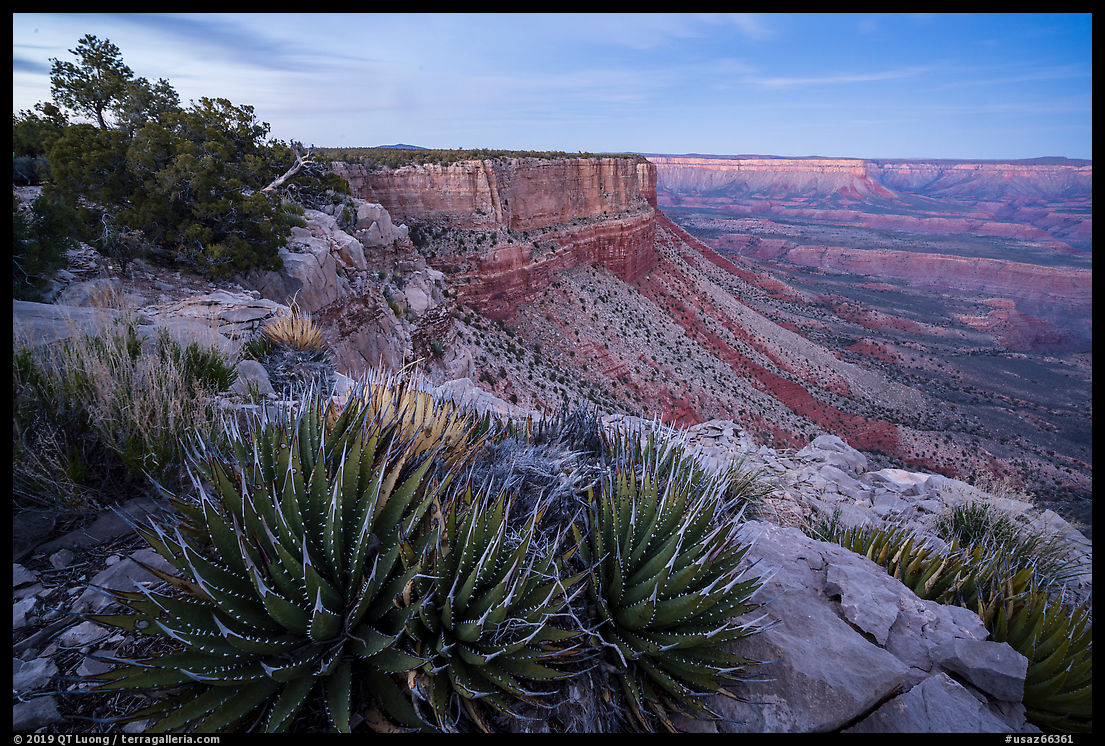
Despite its name, Taos Valley Overlook is not a single overlook, but rather an entire area on the east side of the gorge where a network of almost level trails popular with mountain bikers crisscrosses the sagebrush plateau, leading to the rim of the Gorge. A woman at the visitor center in Pilar had told me that since it wasn’t particularly photogenic nor remarkable, I should spend my time along MN-570 in the gorge instead. However, since I had missed Taos Valley Overlook during my last visit, despite the warming, I was still curious to see what I could discover there. Because of the late hour, I took the most direct route to the rim, the Traders Trail (3.4 miles roundtrip, 250 elevation gain) accessed from a trailhead along NM-68. There was indeed nothing but flats until the rim of the gorge, and the view from that rim was not as spectacular as other rim views in the monument. While the mesa was just a bit breezy, that particular spot on the rim was extremely windy as the lower gorge acted like a funnel. When I tried to photograph with a telephoto lens, it took multiple tries to get a sharp image. Fortunately, I could review on the spot at 100% pixel view to check sharpness and try again. I timed an image for sunset to add a bit of interest to the view, then stayed on the rim until dusk for the soft directional light that I like for canyons. In contrast with southern New Mexico, after sunset the temperatures got chilly. After hiking back in the dark, I drove to La Junta Campground, eating snacks along the way, and arrived at 9:30 pm.


Wild Rivers
Waking up at 6:30 am, about an hour before sunrise, I headed towards what I thought would be La Junta Point, at the southern tip of the plateau, where a viewpoint overlooks the confluence of the Rio Grande River and Red River. After walking for ten minutes, I remembered that the overlook wasn’t that far, and checked my map app to find I had been headed in the wrong direction. This meant I’d be missing the most favorable pre-dawn light for both this view, and also the next one, at Sheep Crossing, about 20 minutes away. After waiting until after sunrise there, when I made images of the plateau, morning was well under way.


In the Wild Rivers area, six short and steep trails descend 700 feet to the river into the gorge, half-a-mile wide at this point. During my previous visit, the trails were closed because of icy conditions, and I was in no condition to hike anyway. I stopped at the BLM visitor center to ask for recommendations on which trail to take. While there, I noticed a publication whose cover featured a striking faraway view of the plateau incised by the gorge that I’d seen before, but when I inquired with the volunteers, they could not identify positively the location, suggesting the surroundings of the John Dunn Bridge. The Big Arsenic Trail (2.4 miles round-trip, 680 feet elevation change) is well-graded thanks to its switchbacks built by the Civilian Conservation Corps and an excellent introduction to the area’s diversity. It hugs the cliffs at the top and at the bottom reaches a clear spring (with no arsenic!). The riverside ponderosa pine and Douglas fir forest grows surprisingly below the pinon and junipers trees at the rim.


Looking for a view
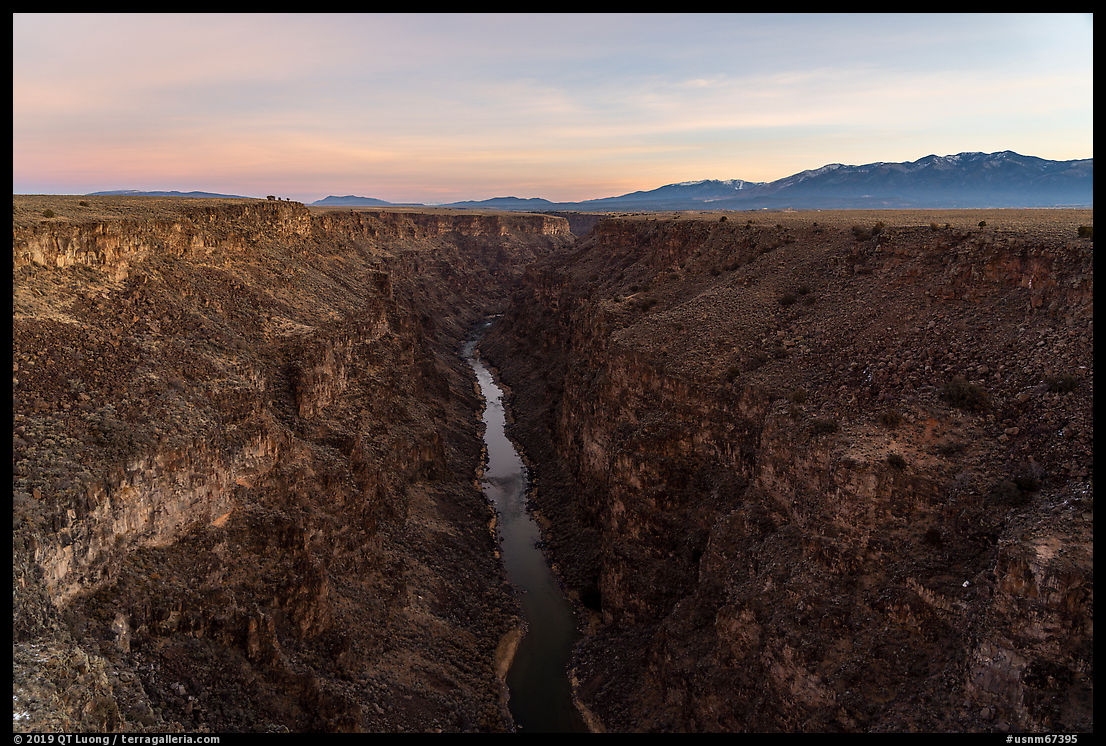
After completing the hike, I drove to the John Dunn Bridge looking for that faraway view. The last time, I hardly saw anybody there, but this time the place was packed. This wasn’t too surprising, since it is the only roadside river access beyond Orilla Verde, the weather was moderate, and the day sunny. As visitors had parked cars and put out chairs all over the riverbanks, I struggled to find an unpopulated view. Driving on the rim, I didn’t find any of the topography I was looking for, but after studying the map further, it occurred to me that I should look back south where I was the day before. The sun was already disappearing from the gorge floor, where I photographed at the edge of the light on the way.


Driving along NM-68 between Pillar and the Taos Valley Overlook Trailhead with my eyes now trained on the plateau below, I soon noticed the cut of the gorge in the distance, indicating that my guess was correct. As the vantage point from the highway was not high enough for a clear view, I followed a dirt road heading up the slope, turning around when it became private. I could not find a composition with a foreground as distant as I’d liked, but the position was was nevertheless an improvement over roadside views. I waited for clouds to pass so that sunlight would illuminate the gorge. Since the gorge was so distant, I launched the drone to try for a closer perspective, but when it was in the position to take the picture, clouds obscured the sun again. The drone was more than a mile out, so there was not much battery power left for hovering while waiting. My next destination was the landmark High Bridge. I had previously photographed it at dawn, but I thought that dusk might be an improvement. On the way, as I approached a rest stop along NM-68, a better view of the faraway gorge presented itself. I could not resist setting up for another photograph, complicated again by the passing clouds and the wind that was shaking my telephoto lens. When I reached the High Bridge, it was 15 minutes late and too dark, an indirect consequence of failing to scout the faraway gorge view the previous day. I drove back towards Taos to find a gas station, then stopped again at the parking lot of the High Bridge to take advantage of the parking lights to cook dinner before driving into the darkness of the monument’s wildest corner.


San Antonio
The corner of the monument west of US-285 consists of rolling grasslands dominated by San Antonio Mountain (10,908 feet), a dormant volcano barely outside the monument’s boundaries. It is a remote area without facilities and far from settlements. I had spotted on the map an unpaved Forest Service road just south of San Antonio Mountain. I followed it until I found a wide pullout where I parked for the night. I didn’t expect anybody to drive by before sunrise, but well before the pre-dawn time I had set my alarm for, several passing trucks woke me up. The morning was cloudy, with no color at sunrise, but dark storm clouds complemented the silhouette of Ute Mountain. Just north of San Antonio Mountain, the plains are incised by the Rio San Antonio, which the information booklet said was entirely hidden from a distance. As I tried to navigate a deeply rutted 4WD road, all I could see was grassy tablelands stretching to the horizon. The booklet at one point said to follow a “trail”, so I assumed I’d arrived at a trailhead reasonably close to the gorge, but all I could see where flats. I drove further until I reached what looked like the monument’s boundary and backtracked. I was about to give up trying to locate the gorge when it occurred to me that I could launch my drone for a higher viewpoint in the air. While I was piloting, out of nowhere a water truck came by to replenish cattle troughs, forcing me to leave the drone hovering as I moved the car entirely out of the way. Even after figuring out the route, a ranching dirt road (that the booklet had called a trail) heading north about 3.5 miles west of US-285 on Forest Road 118 and then branching west after 1.25 miles, the gorge remained hidden by the flats right until I got almost to its rim. It was filled up with mature trees, contrasting with the barren and mostly treeless lands above. The 200 feet deep gorge of dark basalt looked like a miniature version of the Rio Grande Gorge.


On the way back, the tracks on the flats were disorienting enough that I had to check my GPS app to stay on route. Once I reached the pavement, I settled for the 300-mile drive to Valley of the Gods that would take me through four states. After passing mountains in Colorado, for a break from driving, I bought a Subway sandwich. Shiprock under storm clouds was mesmerizing as always. I had to pull out for a photograph, after which I declined to stop in town to refil gas, thinking that I could do so later in Arizona or Utah. By the time I reached UT-163, no gas station had presented itself, so I had to detour to Bluff to make sure I would enter Bears Ears National Monument with a full tank.
The Last Road Trip: 1 | 2 | 3 | 4 | 5 | 6 | 7 | To be continued