Indiana Dunes National Park: Chicago Tonight, Final Spreads and Thoughts
Chicago Tonight
I was honored that WTTW, the Chicago area’s PBS affiliate which is one of the most-watched public television stations in the country, aired a story about my visit to the Indiana Dunes, produced by multiple Emmy-winning Jay Shefsky. The four-minute Chicago Tonight piece, which is very accurate, took about two hours to film and it was interesting to see how Jay was paying attention to every detail while never looking into the viewfinder himself. You may have heard of a Chicago photographer named Vivian Maier. Jay Shefsky broke her story.
Thoughts and poll results for image choice
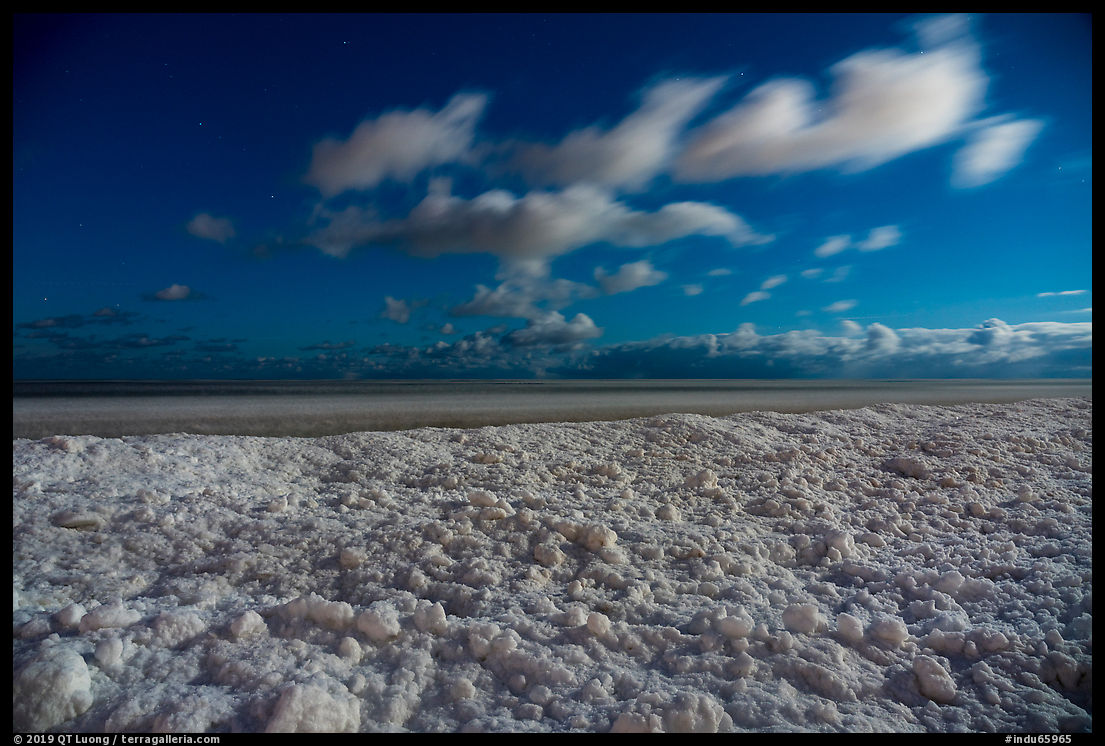
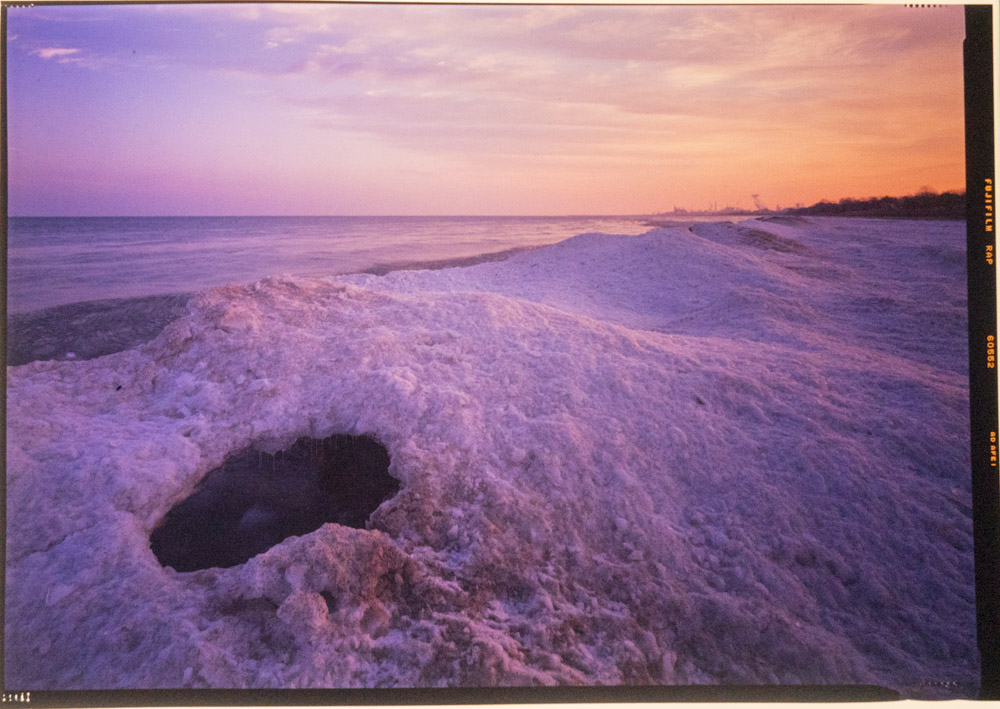
Most of the Treasured Lands book was laid out in a period of several months with back and forth between me and designers. As explained in a previous post, for the Indiana Dunes chapter, I had less than a week after returning home from the trip. Therefore, I chose to play it safe by creating three spreads each with very clear thematic and visual ties about the dunes, the lakeshore, and the biodiversity. The dunes are what the park is named after. The lakeshore described the park before its redesignation, is what attracts most visitors, and its shelf ice is what impressed me the most. The biodiversity is one of the key rationales for the redesignation.The specific spread I asked about in the poll was the second one, about the shore. Consistent with the rest of Treasured Lands, it takes place in four different locations spanning the park: Dumbar Beach, West Beach, the beach at the end of the Paul H. Douglas Trail, and the one below Mt Baldy. Images describe various states of icing. Visually, they are unified by the aligned horizon (this necessitated a bit of cropping of the photos) as well as two secondary diagonal lines that converge in the center of the spread. A second organizing idea is the progression of the center of interest from the water/top to the land/bottom: the iceberg in the lake, the hole in the shelf ice, the beach, the dune grass. Let see how each image functions with respect to those ideas.
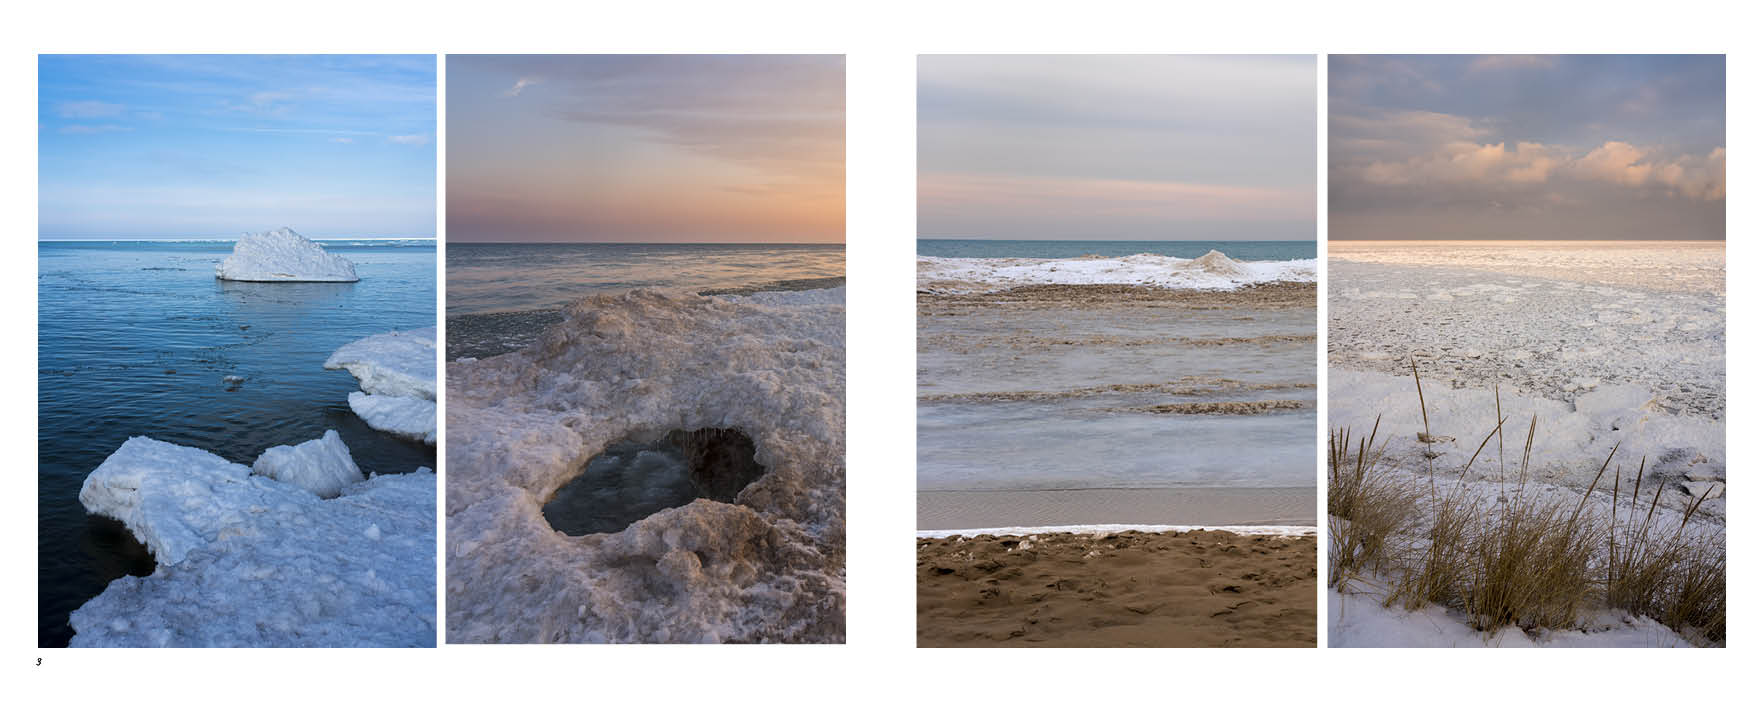
I feel that image 1 is more static because of the parallel horizontal lines. Its subject matter, the mixing of beach sand and shelf ice, is less easily recognizable, making it more abstract. I like its formal quality as a standalone image very much, but within the spread, it lessens the effect of the converging lines.
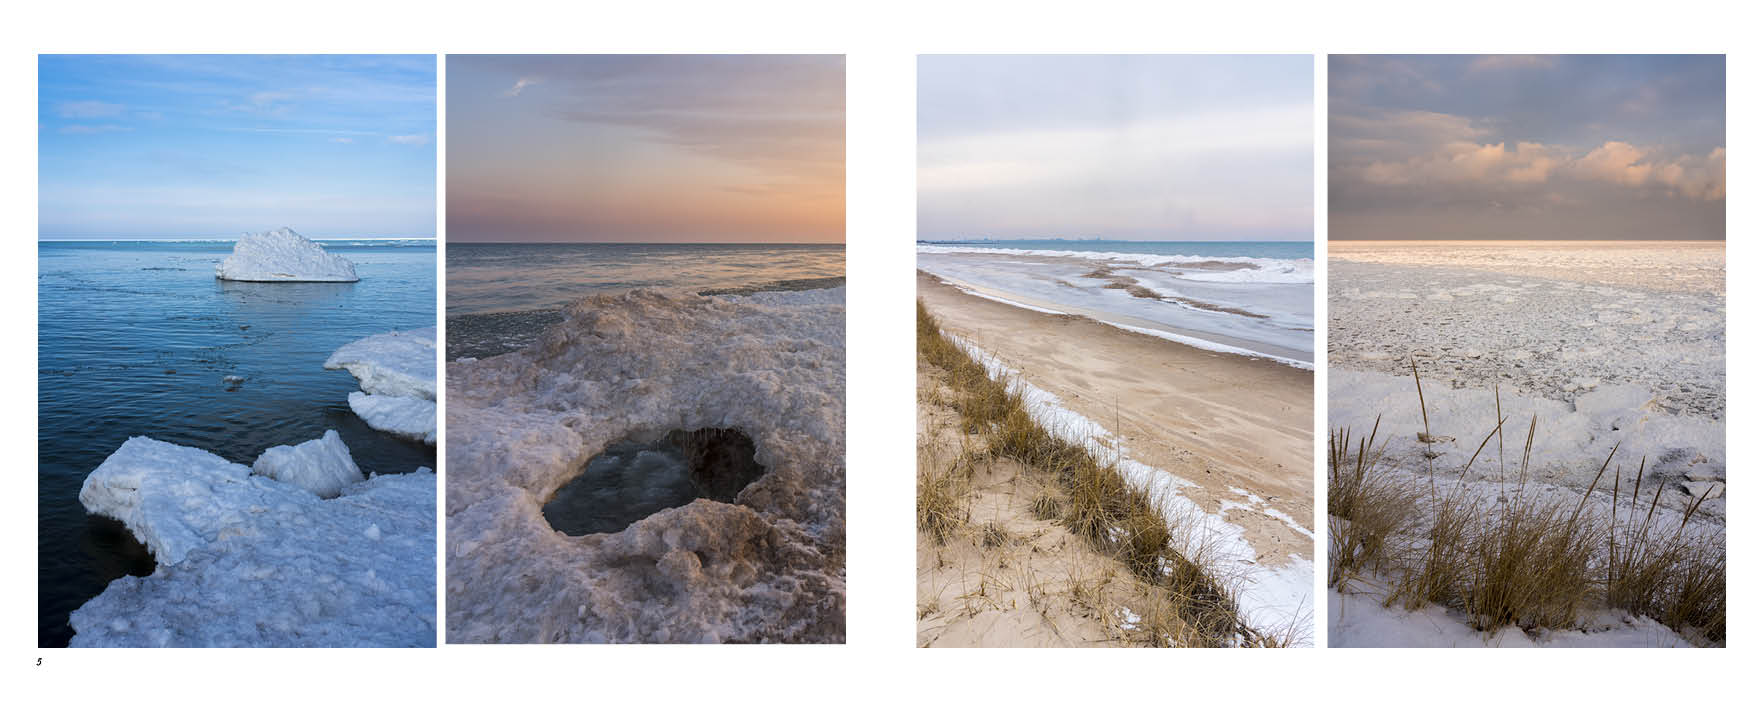
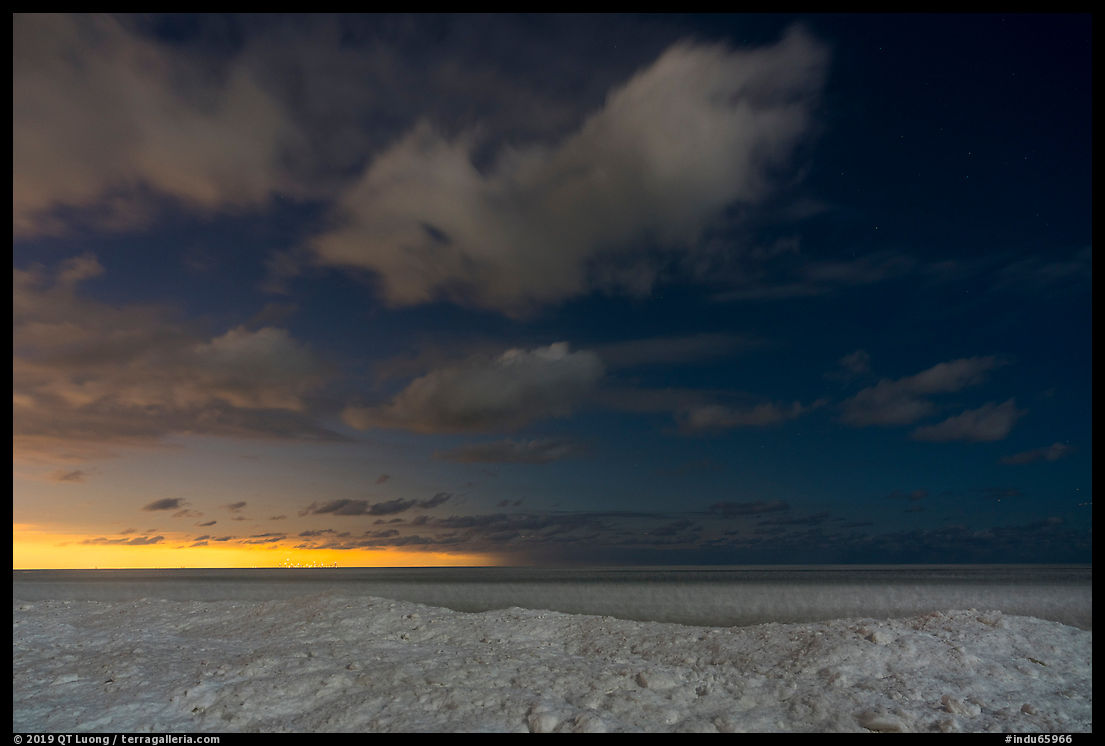
By contrast, the diagonals in image 2 are quite steep. They make the image very dynamic, maybe a bit too much compared to the slope of the other diagonals. Besides showing the beach, the image also includes some of the dunes. This ties the spread to the previous one, which is about the dunes, but it makes the second progression (from water to land) a bit less clear. I wish I had photographed it with slightly less steep diagonals, and that is a case in point for varying compositions when photographing with a publishing project in mind because you don’t exactly know which composition will work better together with other images.
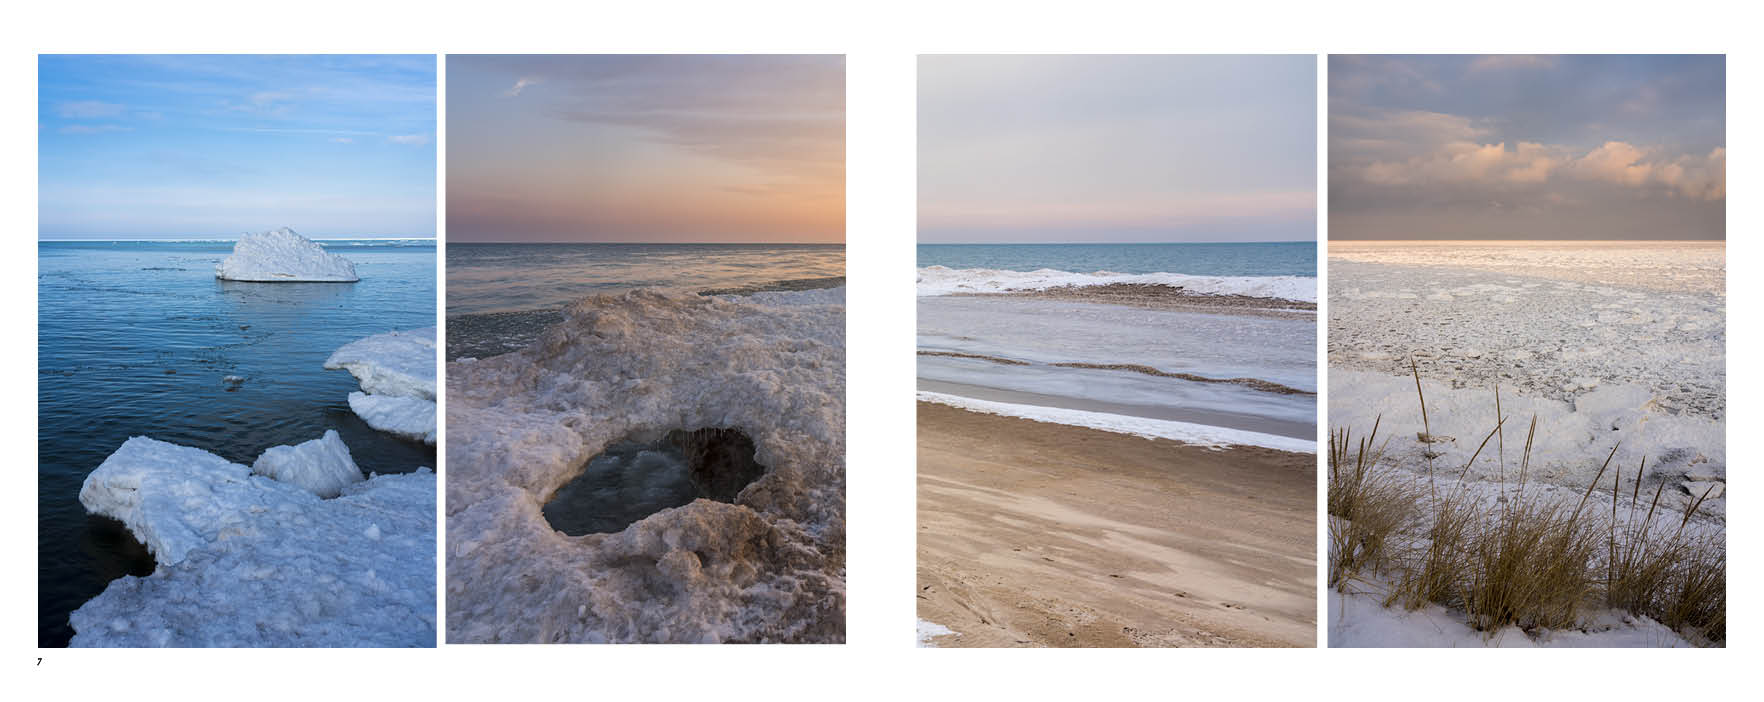
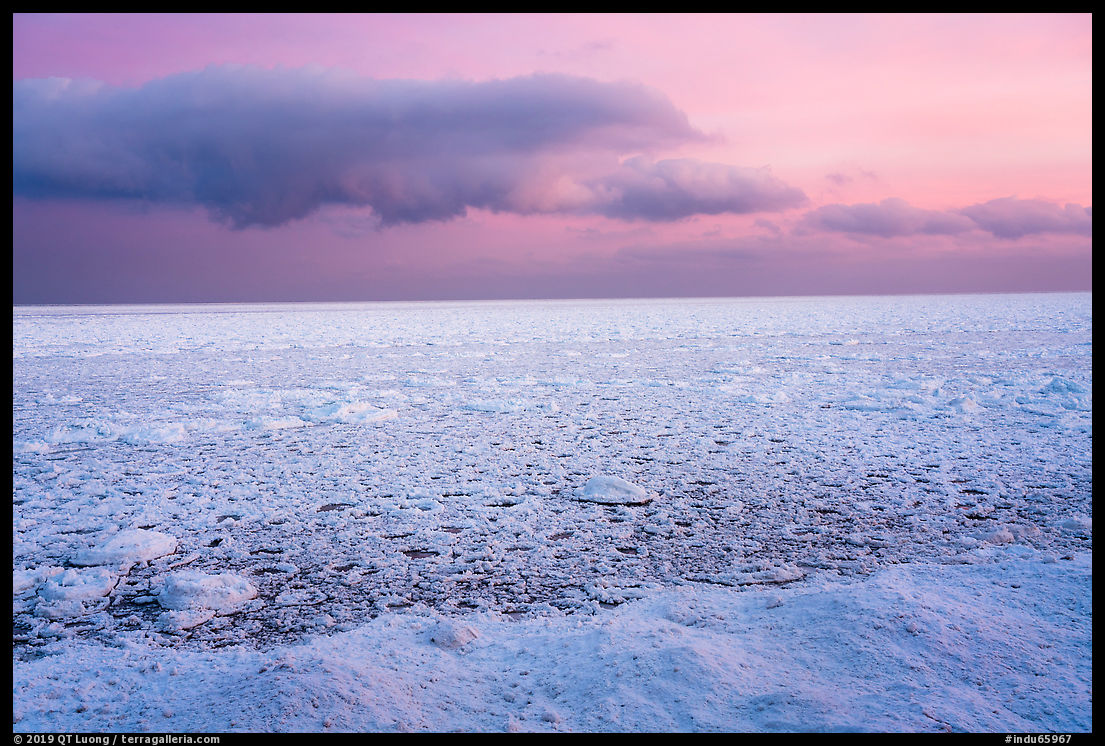
Image 3, actually a crop of a horizontal image, does have the milder diagonals, which you can see prolonging those of the rightmost image, as well as the emphasis on the beach, but there is no denying that as a standalone image, it is not as strong as it doesn’t draw you into the scene the way image 2 does, precisely for its milder diagonals and lack of a foreground. I was hesitating between this, and image 2.

Thank you to everybody who participated in the poll. As one can suspect from the comments, votes overwhelmingly favored image 2. My experience as a bookmaker is that while the book is more than its component images, often you cannot fit some images that are individually strong into the sequence or design. In this case, image 2 works well enough, and I will follow the popular choice. The final four Treasured Lands spreads for Indiana Dunes National Park are at the end of this post. They are in the form of proofs that I already received from the printer, within a month of the re-designation, which means that I met the challenge! I was pleased that an Indiana Dunes park ranger wrote me “As an avid photographer who has taken thousands of photographs of the dunes, I am incredibly impressed and happy with the photos that you have chosen. It really shows off the spirit of Indiana Dunes in the winter.”
Thoughts on the new national park designation
Did Indiana Dunes deserve to become a national park? Since giving awkward answers in a public radio interview, I have refined my thoughts a bit. Visitation is irrelevant, and the historic intent of 1916 is mitigated by the fact that the place was developed so much in the while. Regardless of one’s opinions on this question, it is difficult to dispute that well-traveled visitors to the national parks will “rank” Indiana Dunes near the bottom rather than near the top of the list of national parks. Unlike Gateway Arch, Indiana Dunes is not an anomaly, but simply an extension of the trend for redesignating small areas as national parks which started with Cuyahoga Valley National Park in 2000, and also gave us Congaree National Park and Pinnacles National Park (all three usually “ranked” in the bottom tier with Hot Springs National Park) – while they are still vast areas of the country, for historical reasons mostly located in the west, that have not yet received this level of recognition. The name “national park” brings prestige to an area and attracts non-local visitors. People are attached to their local places, and many of them have actively fought to protect them. That struggle is never-ending, and I am happy for the local conservationists to see that the area received the recognition and additional protection they feel it deserves.However, whether the benefits to the area compensate for the overall devaluation of the “national park” brand by “grade inflation” remains an open question. Every area, no matter small or understated, is in some way unique, but I think a national park should satisfy two criteria. First, it is a landscape-scale natural area with numerous notable features, as per NPS guidelines. Second, it forms a superlative example of its type of landscape, if not the best, whatever it might be. The mix of environments and biodiversity found in such a small area as Indiana Dunes is certainly remarkable, but is that a relevant criterion when the obscure Berryassa Snow Mountain National Monument has biodiversity comparable to the Sierra Nevada, home of Yosemite, Kings Canyon, and Sequoia National Parks?
I can think of two ways the new national park could have been better. The first possibility would have been to include Indiana Dunes State Park, which is surrounded on all four sides by Indiana Dunes National Park. The state park was established in 1925, way before the lakeshore, and features the most spectacular remaining dunes in the area. The 1966 law that established Indiana Dunes National Lakeshore directed the NPS to seek the acquisition of the state park, which falls within its authorized boundaries, but Indiana has never agreed even to a joint management agreement similar to the one that established Redwood National and State Parks. The second possibility would have been to combine the four national lakeshores into a Great Lakes National Park with four separate units. There are quite a few national parks that consist of three or more non-contiguous units. Channel Islands National Park, Acadia National Park, and Theodore Roosevelt National Park come to mind. The three other national lakeshores on the Great Lakes, Apostle Islands, and Sleeping Bear Dunes are larger, and in my opinion, more scenic than Indiana Dunes. The combination of the four of them would have resulted in a top-tier national park.
Regardless of what could have been, personally, I am glad that I got to visit a new place, one which is not located in the West, and which does not consist of mountains for a change. Natural and geographic diversity is what prompted me to visit all the national parks, and Indiana Dunes National Park does contribute to it!