2018 in Review, Favorites, and Seasons Greetings

Although it may sound like a long time ago, it is less than three years since President Obama proclaimed three national monuments in the California desert. In January, I explored those new protected lands, for which there is much less information, let alone photographic information, and way fewer facilities than for their more well-known and long-established counterparts: Mojave Trails National Monument, Castle Mountains National Monument, Sand to Snow National Monument.
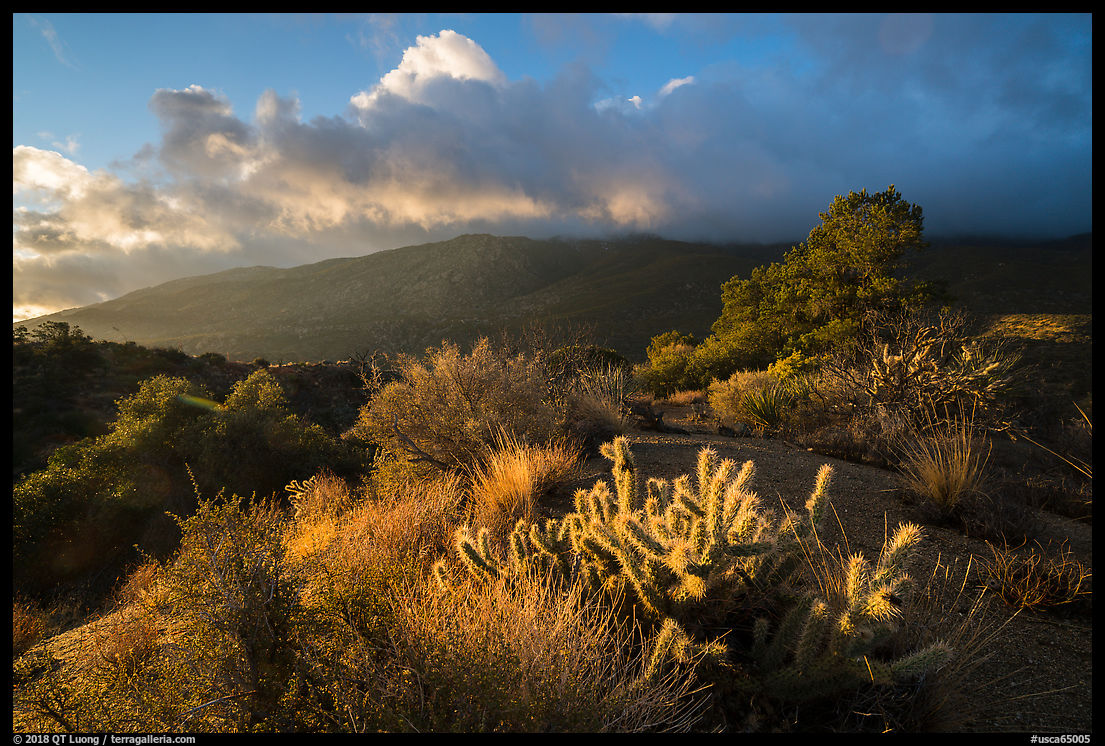
I also visited the two slightly older national monuments located in the area. In both Santa Rosa & San Jacinto Mountains National Monument and San Gabriel Mountains National Monument, surprisingly big mountains rise near the city, with easy to access high-elevation areas that don’t require hiking.

On February 22, 2018, Jefferson National Expansion Memorial became Gateway Arch National Park, our 60th national park. I traveled to St Louis, Missouri, that same week to try and extend my record of being the first to visit and photograph all the national parks, and even dusted out my large format film camera for the occasion. In those posts, I reflect on what I found at this most unusual national park: First Impressions, Photographing Gateway Arch, Thoughts on a Name.

Although its southern tip is located only one hour from the San Francisco Bay Area, for most people, Berryessa Snow Mountain National Monument is more strange and remote than the Sierra Nevada, Lassen, or Shasta. In this nearby but undiscovered landscape, it is still easy to experience solitude and find little-photographed views: South of Highway 120, Snow Mountain. Where is it? Is there snow?.
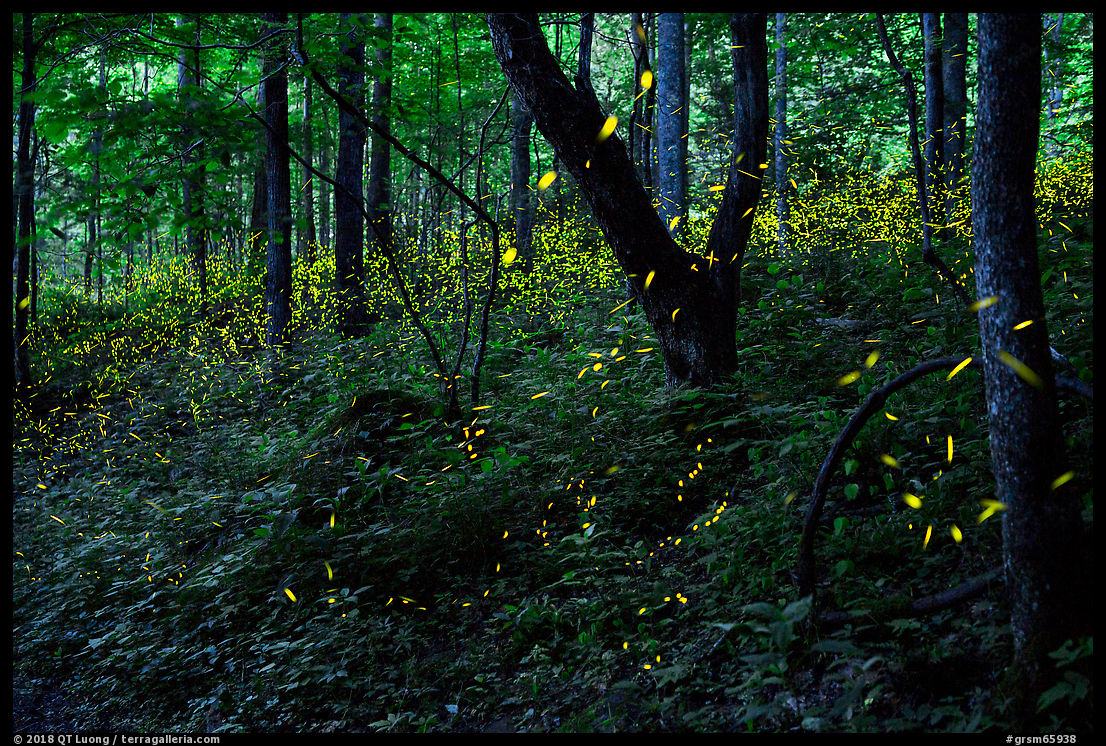
One of nature’s most wondrous light shows occurs during the synchronous fireflies mating season, when the bugs flash at once in a silent symphony of sparks. Synchronous fireflies exist only in a handful of places in the world, with Great Smoky Mountains National Park being the most well known. Armed with high-performance digital cameras unlike during my previous visit there, I returned in June to photograph the awesome event: Photographing the Great Smoky Mountains Synchronous Fireflies, Synchronous Fireflies Beyond the Smokies, Firefly Variations.
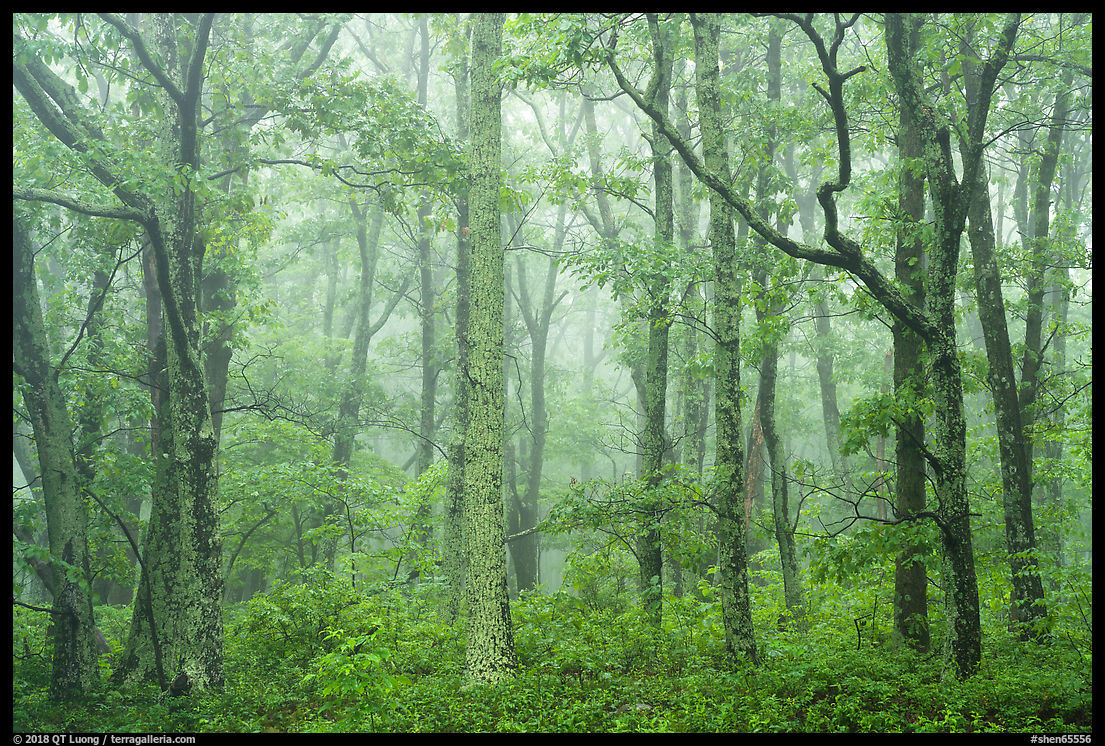
Besides the fireflies, I checked out a few out-of-the-way and often understated corners of eastern national parks that I had not visited in previous trips. Those write-ups have also a few photography tips: Waterfalls in Whiteoak Canyon, the scenic gem of Shenandoah National Park, Cataloochee, the Quieter Side of the Great Smoky Mountains, Wet Places in a Dry Land, Mammoth Cave National Park, Twice the Same River: Tinkers Creek Gorge, Cuyahoga Valley National Park. However, I owe some of my favorite images of the trip to weather rather than scenery.
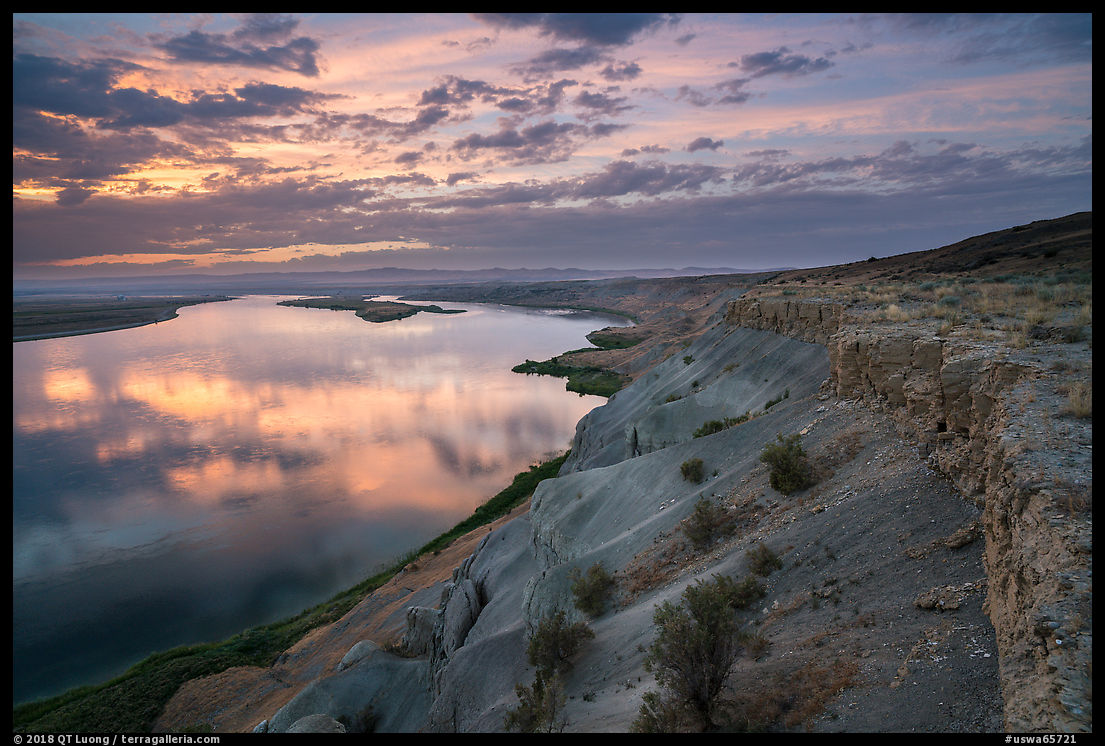
During the summer, I traveled to Hanford Reach, maybe the national monument with the most unusual history of all. Its lands were initially set apart from development not for conservation, but as a security buffer zone for the top-secret Hanford Nuclear Reservation where the plutonium for the Nagasaki bomb was manufactured, and which became the most polluted site in the Western Hemisphere.
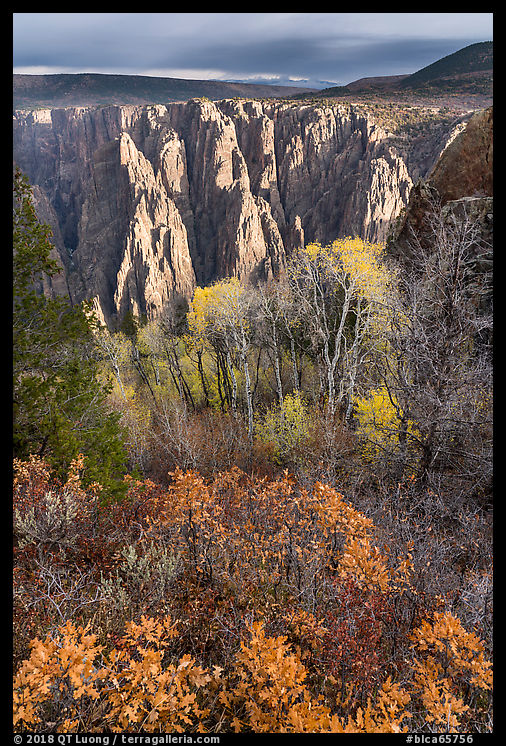
Autumn is my favorite season, but I spent so much time in the deserts that I almost entirely missed the foliage. Fortunately, I made a quick stop at Black Canyon of the Gunnison National Park, at just the right time to hike two favorite moderate trails there.
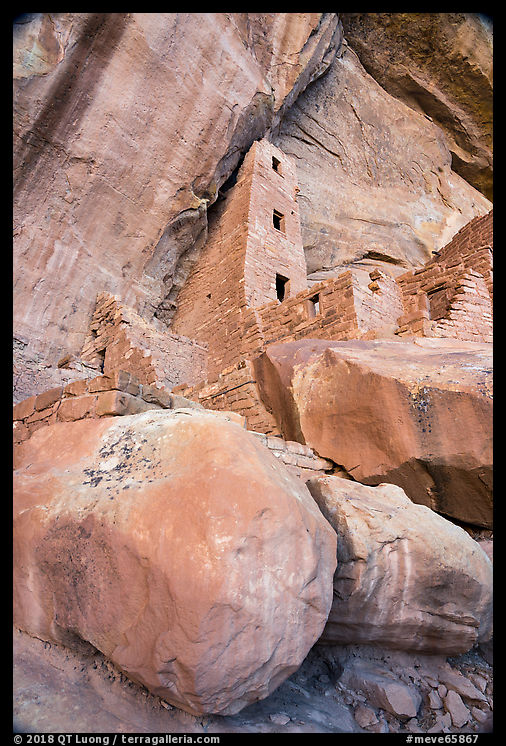
Mesa Verde National Park can be congested. Fortunately, there is a quieter side to the park and recent new oppourtunities. Although home to a cliff dwelling that matches Cliff Palace, Wetherill Mesa sees only a fraction of the visitation of the main area. And there are a few other cliff dwellings that are even less visited, although quite famous.
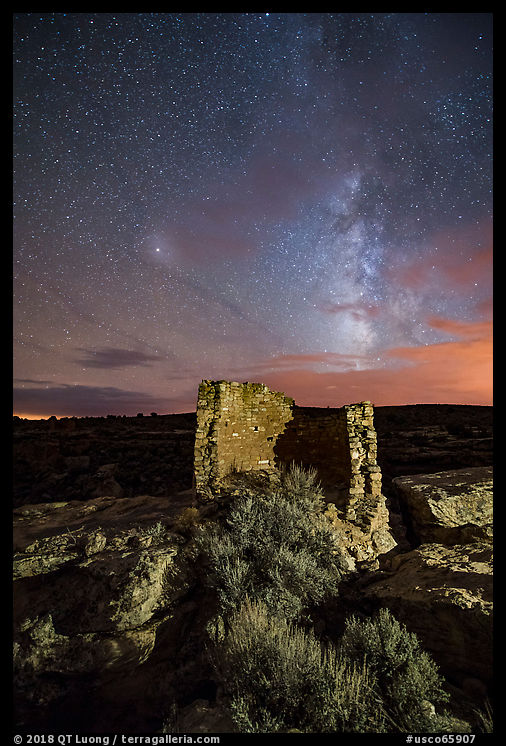
This year, I ended up traveling to 11 national parks and 24 other federally protected areas. Amongst the later, there were quite a few Ancestral Puebloan sites, and I’ve detailed my visits to Yucca House (the worse national monument?) and the interconnected cultural landscape of Canyons of the Ancients National Monument. The later totally surrounds another older national monument where this last favorite photograph was made. I’d appreciate it if you would let me know which of the ten are your favorites!
If you’ve read so far, thanks again for looking. Wishing you Happy Holidays, or Merry Christmas, and a great time with family and friends, full of peace, love and joy!


