The Con Dao Islands are possibly the last unspoiled coastal destination in Vietnam. Traveling there, you feel you’ve made it to the end of the country. Less than two decades ago, the only air link to the mainland was a helicopter carrying mostly military personnel that flew a few days a week. Read on to find out why those remote and obscure islands should be on the adventurous traveler’s list.
Last spring I traveled to Vietnam – for the tenth time – to attend my mother’s funeral with my family. When I announced to our relatives our intention to visit the Con Dao Islands afterwards, they all said it was such a sad place, and suggested Phu Quoc Island instead.
Con Dao’s past

The Con Dao Islands have a grim reputation amongst the Vietnamese because starting from 1862, under French colonial rule, they were home to the most feared penal colony in the country. Most of the prisoners were nationalist and independence activists. An estimated 22,000 died on the island.

Since the closure of the prisons in 1975, the visitors to Con Dao have been mainly Vietnamese on a patriotic pilgrimage to honor national heroes. The most celebrated of the Con Dao prisons victims is Vo Thi Sau, at age 19, the first woman to be executed on the island in 1952.

The town of Con Son
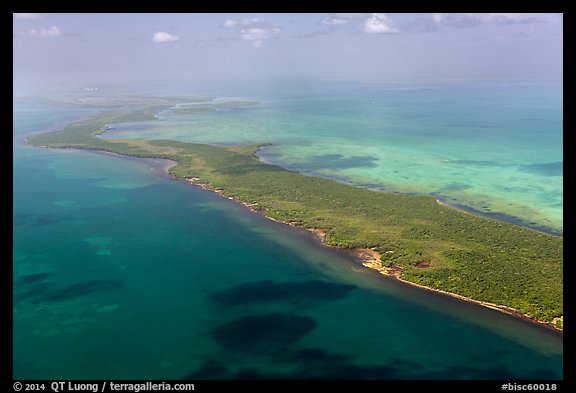
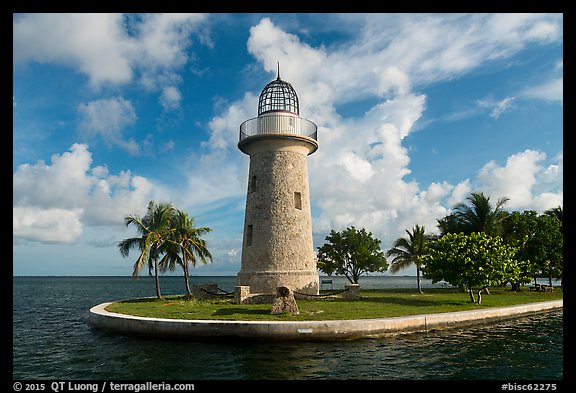
The attraction for the visitor is that the islands tragic history, combined with its remoteness, has left them remarkably untouched. The Con Dao Islands are located in the South China Sea, 115 miles (185 km) south of Vung Tau, 143 miles (143 km) from Ho Chi Minh City. Of the 16 islands and islets, only the largest one, Con Son (also known as Con Lon), is inhabited.

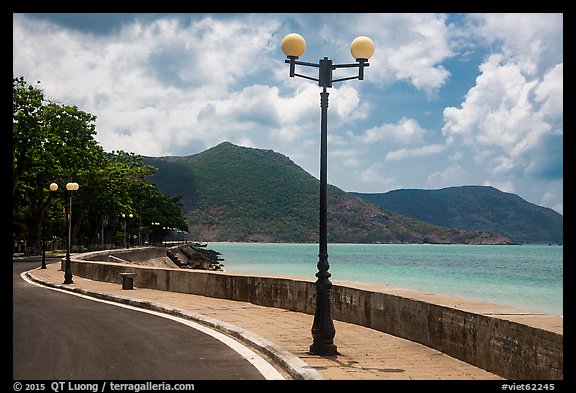
Con Son, the only town on the island, feels like a sleepy village. The atmosphere is more relaxed than any other place I’ve seen in Vietnam. Cars are rare. Crime is non-existent: residents don’t even lock their doors or their bikes. It is surreal to stroll the seafront promenade in Con Son and see it totally deserted most of the day.

Some activity takes place at sunrise, mostly on the piers where fishermen unload their catch. However, it is in the evenings that the locals gather there. The main beach goes from almost empty to quite popular with a few street vendors offering foods.

The streets are lined with tall trees. Fading colonial-area buildings confer a sense of visiting an abandoned outpost of French Indochina.

The old custom house has been restored, and transformed into the only beachfront cafe, a great place for a drink or ice-cream.

Loi Voi Beach is at the north end of the promenade. An Hai Beach lies at the south end of the promenade. You’ll find there beach front resorts with stunning views of Con Son Bay and offshore islands and islets.
Bay Canh Island
The largest of those islands, Bay Canh, is entirely located within Con Dao National Park – which also protects most of the forested interior of Con Son Island. It was interesting to see Vietnam’s implementation of “America’s Best Idea”, complete with maps, a visitor center and ranger station, interpretive signs, and paved trails.

We hired a boatman with a speed boat to take us for a day to Bay Canh.
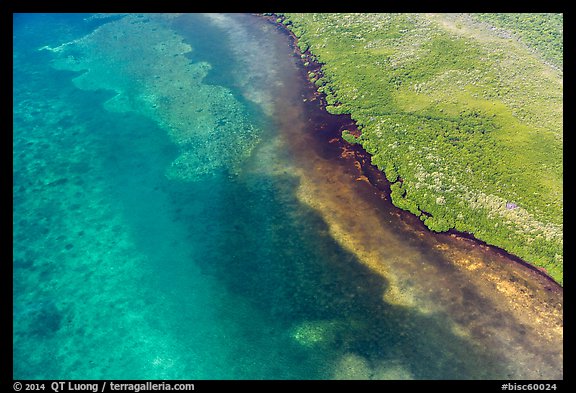
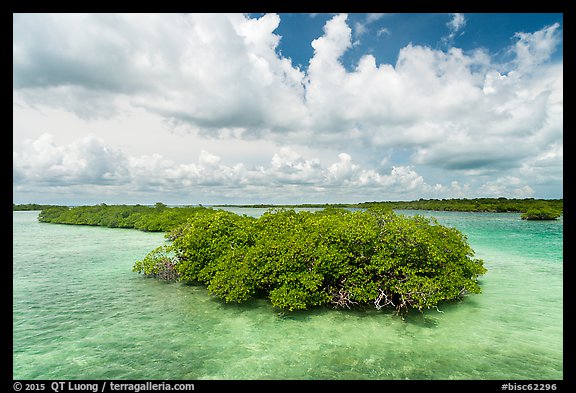
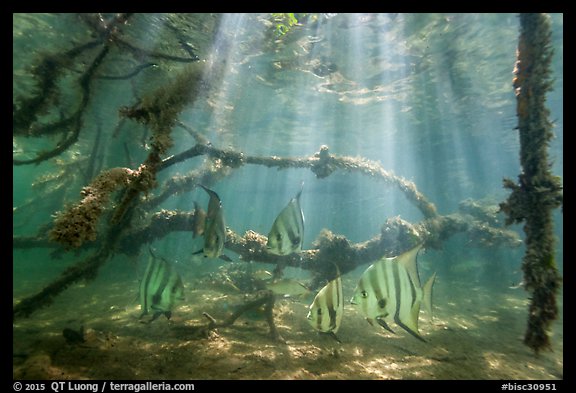
The turquoise waters invited snorkeling. Traveling with the family, I didn’t scuba dive, but I wasn’t surprised to read that Con Dao offers by far the best diving in Vietnam. I saw two dive shops in town, which appear to be certified to international standards.

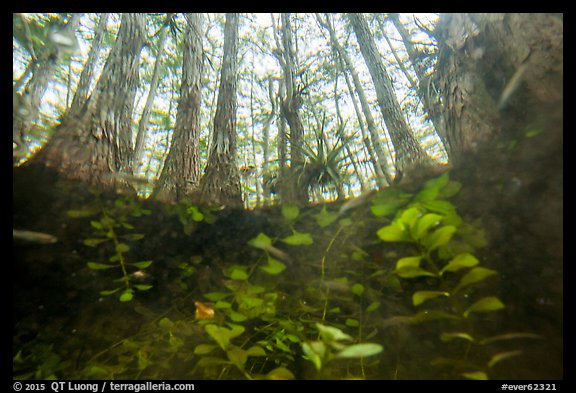
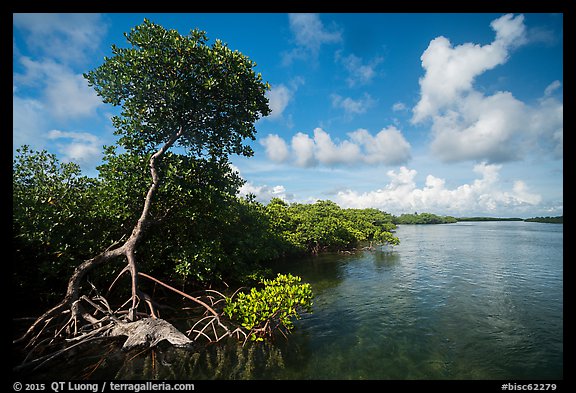
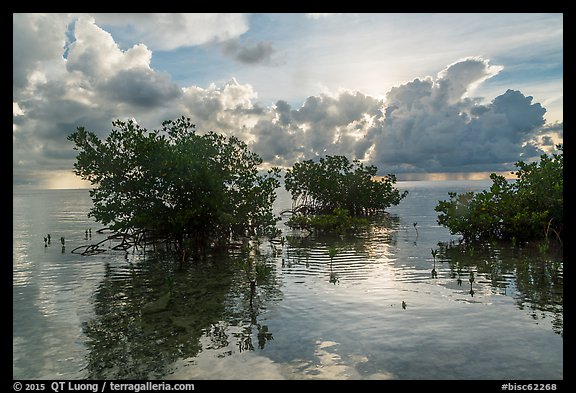
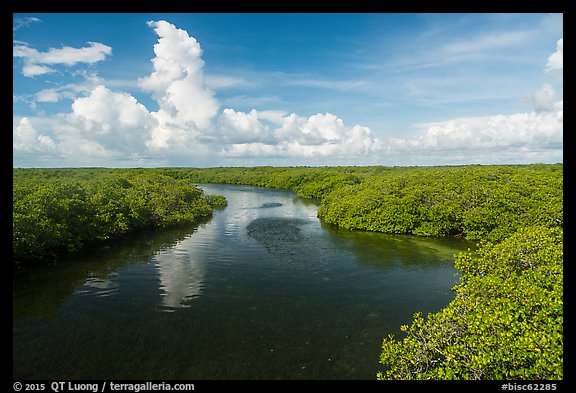
The coastline of Bay Canh is quite varied. One of the last primeval mangrove forest in Vietnam grows there, home to tank-crabs foraging for food. There are also sandy beaches where sea turtles lay eggs at night during the mating season.

Con Son South
Because of its small size – 20 square miles (51 square km) – Con Son island can be easily explored by rented motorbike or by taxi. Going south, the road ends at the colorful fishing port of Ben Dam, set in a beautiful lagoon.

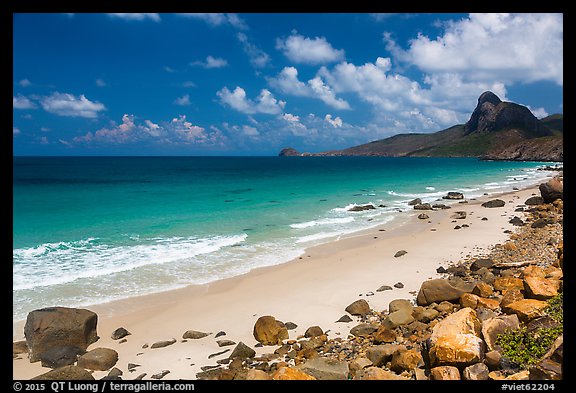
On the way, you’ll pass Nhat Beach, maybe the most beautiful beach of the island, with its fine white sand, rocks, and backdrop. I didn’t see a soul on the wind-swept and pristine beach.
Con Son North
Going north, the road skirts the mountains (elevation 1,500 feet) which make the island so rugged. The number of beaches is limited, however their backdrop is spectacular.

It ends at the airport. Orange sand Dan Trau Beach sits right at the end of the runway. Unlike at the other beaches on the island, which are all undeveloped, two makeshift restaurants offer food and drinks, as well as restrooms and showers. Because of the rugged topography of the island, the airstrip, bookended by two beaches, is short, accommodating only propeller planes.

While waiting for our flight, Con Dao Island had one last treat in store for us: a stand selling edible bird’s nest. The congealed saliva of Asian swiftlets are one of the world’s most rare and expensive foods – sometimes dubbed the “caviar of the East”. Once reserved for emperors and their courts, the food is consumed as a porridge. I find it rather bland, but it is believed to deliver a lot of health benefits – at a price: a kilogram (32 onces) retails for about $2,500. The nests are harvested by climbing on the sea cliffs and the sea caves of Con Dao’s archipelago small islets. I wished I had learned from them before, so that we could have to arranged a visit to witness the precarious activity.

Traveling to Con Dao Islands
Con Dao Islands are a 1 hour flight from Ho Chi Minh City via Vietnam Airlines, the only airline to fly there. There are about 5 flights a day, with the cost in the $150-$200 range (RT). For individual travelers, renting a scooter offers the most flexibility, however taxis have recently become available.
Con Son offers a range of accommodations for all budgets, from budget guesthouses (starting at $20) to resorts ($100), with the outlier being the
Six Senses Resort ($600-$2,000). We stayed at the Con Dao Sea Cabanas (also known at Con Dao camping). They offer the most reasonably priced beach front accommodation on the island, in the form of tent-shaped, A-frame individual bungalows which are small but adequately equipped (mini-fridge and AC). We didn’t make a reservation and just asked the taxi driver to take us there from the airport.
Con Dao’s future
With its great natural beauty, it is clear that the future of Con Dao Island is bright. It is interesting to compare it to the other southern archipelago, Phu Quoc Island. They are the two most compelling beach destinations in Vietnam, partly protected as national parks that include thick interior jungle and turquoise bays.
Phu Quoc, large and fringed with wide sandy beaches, home to a recent international airport, is on the verge of major development which the Vietnamese governement hope will make it the next Phuket. By contrast, they would like Con Dao to become a high-end destination pioneered by the Six Senses Resort – where “Brangelina” has stayed. However, because of the respect for the tragic history of the place, development has been very slow. To this day, foreign visitors remain very rare. Will you be one of them ?
More photos of Con Dao Islands