Summary: A survey of more than ten of Galen Rowell’s books, representative of the whole arc of his career, by a photographer he deeply inspired.
Galen Rowell (1940-2002) was a man of many considerable talents who touched several universes: one of the world’s most accomplished climbers and adventurers, a prolific author, an advocate for conservation and Tibet, and the “the world’s best known photojournalist”. However, like Ansel Adams,
Eliot Porter, and
Philip Hyde before, his enduring love and
most influential area was landscape photography. Although his work, also primary published by Sierra Club Books, can be traced to this great American lineage inspired by Transcendentalism, Rowell differs from them in a simple, but profund way. Whereas they
all relied on the large format camera, Galen Rowell worked exclusively with 35mm cameras and color slide film.
With them, Rowell traded descriptive power for mobility and speed, with emotional appeal being the main goal. He pioneered a kind of photography in which he was not a detached observer, but rather a participant in the scenes that he photographed. His presence (sometimes explicit, often implied) added a new meaning to the photographs, for the landscape and the adventure were part of each other. His light equipment made it possible to reach the mountain tops and show the views from there. It also allowed him to seek ephemeral moments when light and landscape interact in ways that transcend specific situations.
As a testimony to the appeal of his approach, unlike Eliot Porter or Philip Hyde, several of his books are still in print. The power of those books can be attributed to his writing as much as to his photography. Rowell was a writer with considerable intellectual depth and broad knowledge. Like Ansel Adams, his two main subjects were photography and the natural world. However, unlike Adams, he articulated his vision specifically to place his photographs in a story. He understood that the photograph alone could only arise emotions, whereas words would add facts and context. Although Rowell lectured, exhibited, taught workshops, and wrote in magazines, his books made the strongest impact.
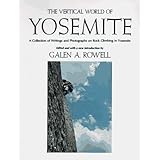 The Vertical World of Yosemite: A Collection of Writings and Photographs on Rock Climbing in Yosemite
Galen Rowell took up photography to document his climbs in Yosemite and the Sierra Nevada, starting from 1962. In 1972, he boldly sold his small automotive business to become a full-time photographer, while he was the father of two small children. By a turn of luck, within a year, he landed a National Geographic assignment to photograph a climb in Yosemite. Exceeding expectations, he participated in the first clean (without pitons) ascent of the face of Half-Dome, producing a reportage which became the cover story of the June 1974 issue of the magazine.
His first book also emerged from that effort.
Although The Vertical World of Yosemite (1974) is the first pictorial volume about the world of climbing in Yosemite, it is not of interest to photographers, except maybe to see how Rowell started. The book is an anthology, for which Rowell edited the texts by fellow climbers, wrote introductions, and contributed photographs – slightly less than half. All the photographs by other climbers are in black and white. Some of Rowell’s are in color. Most of the photographs are action photos from the wall, with a few striking portraits. They are essentially documentary and not particularly well reproduced. However, amongst them are “El Capitan Clearing Storm”, one of his greatest images of the Valley, which I feel captures its dynamic nature like no other. Its low vantage point places the viewer in the scene, unlike Ansel Adams “Winter Clear Storm”, whose high viewpoint imbues it with a comparatively disembodied quality.
 The Yosemite
John Muir’s explorations of Yosemite took place a century before Galen Rowell’s own, but the juxtaposition of their work in The Yosemite (1989) is felicitous. With his spiritual perspective and clear description of the park, Muir created a classic work of natural history. The book alternates between the reproduction of Muir’s entire work, and pages devoted to
Rowell’s contributions, highlighted by a different typography. For each of the 100 plates of photographs, Rowell not only selected a quote from Muir relevant to the photograph (as Philip Hyde would also do in his last book) but also answered Muir in his own words.
As a climber residing in Berkeley, Yosemite was naturally Rowell’s playground. Following in his footsteps, I also spent countless days hiking, climbing, and skiing in the park, eventually resulting in a
book. Having memorized each of the turns on the road from Berkeley to Yosemite, I often tried to improve my personal speed record for the drive, until clocking in at what I thought was a respectable 2 hours and 15 minutes. I subsequently learned that Galen Rowell had bested David Brower’s record of one hour and half (source).
Rowell’s initial focus was on adventure. After the publication of his esthetic manifesto in Mountain Light, photography took first place.
Rowell’s intimate familiarity with Yosemite has resulted in one of my two favorite color photography books of the park (the other one is
William Neill’s). Although the landmarks are there, Rowell managed to create intensely personal images through attention to light, weather, thorough exploration of out of the beaten path locations (such as Ribbon Falls and Diving Board), and the inclusion of figures in the landscape. Not all images look impressive, but the more you know Yosemite and its iconography, the more you appreciate what Rowell did as a whole.
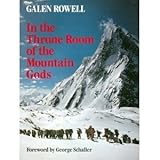 In the Throne Room of the Mountain Gods
In 1975, Galen Rowell was invited to join the American expedition to K2, his first trip out of North America.
In the Throne Room of the Mountain Gods (1977) combines a particularly candid account of the human dynamics within the failed 1975 American expedition with an extensive recounting of former K2 expeditions. The first book he wrote and illustrated entirely, it is about mountaineering and climbers (rather than even the climb), however the photographs convey the beauty of the region.
Most of the book is devoted to the narrative, which has become a mountaineering classic. Small black and white reproductions of images from a number of photographers, including Rowell, serve merely to illustrate the narrative. In addition, six groups of eight plates reproduce Rowell’s photographs in color. They include many of the enduring images he would discuss in Mountain Light.
 Mountains of the Middle Kingdom
It is in the Himalayas that Rowell’s life as an mountaineer-explorer blossomed. Inspired by the new frontiers, Rowell would combine his intellectual curiosity, writing, and photography into pioneering adventure photojournalism.
In 1980 and 1981, Rowell travelled through all the eight mountain provinces of China – the first westerner to do so – climbing many peaks along the way. Mountains of the Middle Kingdom (1983) is “a rediscovery of mountain regions lost in history, created by a blend of past and present, exploration and politics, mountains and people”. After reading seemingly every book about the region, Rowell wrote with exceptional insight about the natural history, history, and politics of the region, adding mountaineering for good measure, in what became his trademark synthesis. In particular, although his sympathy lies with the Tibetan people, he manages to weave a nuanced story which neither follows the official Chinese nor Tibetan points of view.
The photographs in the book testify to the vast range of his interests, including landscapes, and cultural images. The book cover features his most famous image, “Rainbow over Potala”, which was taken on the first of his trips. Packaged by Yolla Bolly Press, the book design reproduces Rowell’s main color images on full pages. Expedition and historic images are incorporated to the text and reproduced in black and white. Galen would later upgrade the status of one of them, “Anye Machin in high winds” (p 164) by selecting it for Mountain Light – in color.
 My Tibet, Text by his Holiness the Fourteenth Dali Lama of Tibet
In this first books, Rowell’s writing was as important as the images. Feeling that the most significant contribution he could make to the Tibetan cause was to make great photographs to show the world what should be preserved in Tibet, he strived to create a “visual record of one of the earth’s unique wild places”. From the start of the My Tibet book project, Rowell envisioned the writing to be by the Dalai Lama. The idea of such a respected political and religious leader commenting on images by an adventure photographer looked unlikely, if not preposterous. However, Rowell arranged an audience with the Dalai Lama, and during the slide-show that he shared with him, they bonded over their common passion for Tibetan wildlife.
My Tibet (1990) consists of photographs of varied subjects, paired with specific comments about them by the Dalai Lama, who also contributed a few essays. Those photographs defined how the world saw Tibet. Nobody had made a better portrait of the region, and nobody probably will, given the unfortunate changes that have occurred since then. Galen’s growing reputation allowed him to turn into a life-long advocate for the environment and culture in Tibet.
 Poles Apart: Parallel Visions of the Arctic and Antarctic
The sub-polar regions have always been a fertile ground for adventure. Rowell’s all-around abilities excelled in their forbidding terrain, harsh beauty, and pristine condition. At the time of publication (1995), the poles hadn’t been reached yet by mass tourism. Like Eliot Porter’s, Rowell’s trip to the Antarctica was accomplished on scientific ships with the aid of NSF grants. The sense of exploration and discovery is palpable in the book. The photographs are impressive and inspired, striking a remarkable balance between fine art photography and photojournalism. Rowell aimed to make them accessible by balancing the unfamiliar with the familiar. He succeeded by mixing images of scenery, wildlife, and human interest – mountaineers as well as scientists and native inhabitants.
The organization of the book is original and compelling. Part one consists of 37 pairs of matching photos – one from the Arctic and one from the Antarctic – reproduced full-page on a spread, with a short caption. They reveal the fascinating similarities and differences between the northern regions and the southern regions. Part two contains 24 two page photo-essays on a range of topics. Most of the writing is in part three. It consists of comments on each of the photographs in parts one and two, providing a mix of background information and details on how he came to make the photographs.
Poles Apart is more photo-centric than his previous books. The photographs shine, with plenty of white space. They are well reproduced, at a size when their grain isn’t readily apparent. There is just enough text in the extended captions to provide understanding for the subjects, yet not overwhelm the photographs. The design achieves some of the best balance between information and photographs I’ve seen in a photography book. For all those reasons, I consider Poles Apart to be Galen Rowell’s best photography book.
 Bay Area Wild: A Celebration of the Natural Heritage of the San Francisco Bay Area
After a lifetime of exploring far and wild places, Galen Rowell turned his lens towards his native San Francisco Bay Area relatively late in his life. His inspiration came upon his wife Barbara’s observation that the Bay Area’s parks offered more diverse landscapes than Costa Rica, a much touted ecotravel destination. “Though I had spent decades celebrating the grand design of natural areas around the world in words and photographs, I had looked right past the extraordinary rich and varied wild hills, valleys, deltas, bay, ocean, islands and mountains in my own backyard.”
Some say that you do your best work close to home. However, after traveling to the most spectacular places on earth, would Rowell find enough inspiration in the Bay Area ? “I’ve known all along that more of what I am seeking in the wild is right here in my home state of California than anywhere else on earth. But… I couldn’t say it with authority until I had all those journeys to Tibet, Nepal, Pakistan, China, South America, Antarctica and Alaska behind me”. Living conveniently near the locations allowed him to return frequently, resulting in some of his most carefully crafted landscape photography. Great variations of light and feeling characterize a mature vision. In this seemingly modest ground, Rowell produced images rivaling his work from remote corners of the earth.
For the text of Bay Area Wild (1997), Rowell chose to deliver a conservation message, highlighting environmental issues, and our responsibility to protect the planet, viewing the book as a “guide for other rapidly expanding metropolitan areas”. The Bay Area wildlife can be more elusive than in wilder places. To complete the project in a timely manner, Galen enlisted photographer Michael Sewell, who had spent years developing unusual techniques to capture wildlife images in the Bay Area. It is interesting that Sewell also contributed some landscape images which could easily have been attributed to Rowell. At a book signing, I asked Galen Rowell which of his books were favorites. He placed Bay Area Wild on his short list, together with Poles Apart, My Tibet, and The Yosemite.
 North America the Beautiful
In this latter years, Rowell focused less on expedition-style photography than on more mainstream (if the term is appropriate for any of his photography) nature photography. As his Mountain Light business demanded more of his time, expeditions became shorter and less intense.
North America the Beautiful was published by AAA (2001), and then reprinted by White Star (2006) and JG Press (2010). The book consists of portfolios organized by vast geographic regions, from Hawaii, Mexico, and the Caribbean, to Greenland, the Canadian Arctic and Alaska with the temperate areas in-between. Each of them is introduced by personal comments by Rowell about the region.
Because of the oversize format of 14.3 x 10.5 inch (largest of any of his books), and the availability of images by other photographers of some of the same subjects, the book shows some of the limitations of Rowell’s 35mm approach. The printing often appears overly grainy and lacking in tonality, particularly in colorful skies. Nevertheless, as the last book he wrote and photographed, North America the Beautiful sums up magnificently Galen Rowell’s life work in the natural areas of our continent.
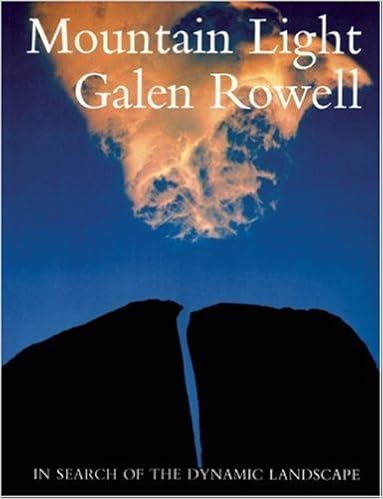 Mountain Light: In Search of the Dynamic Landscape
One of the main subjects Galen Rowell had been writing about is photography. He was interested not only in the mechanics of the
medium and the physics of light, but also in its cognitive aspects and its relationship to human perception. In his own photographic work, Rowell was particularly fond of optical phenomena in the natural world. He referred to his landscape photographs as “dynamic landscapes”: not only because of the fast-changing conditions, but also his strenuous pursuit of the best camera position at the optimal moment. His photographic practice could be summarized as: anticipate opportunities, seek edges (both geographic and temporal) and travel light.
Mountain Light (1986) developed those topics amidst a backdrop of inspiring travel narratives. The book is organized into 7 sections of short essays discussing various aspects of Rowell’s work, alternating with 8 “exhibits”, which consist of photographs thematically related, each accompanied by a comment on the context of the photograph. Galen understood that light is the primary ingredient for photographs. He looked for it to express peak moments in nature. The exhibits start with types of light: magic hour, backlight, soft light, sundown to sunrise, artist’s light. They end with dynamic situations: figures in a landscape, light against light, unexpected convergence.
I first realized that the type of mountain photography I was doing could be elevated to an art form through the words and images in Mountain Light, when a friend from North America shared his copy with me in the late eighties – Rowell’s name was hardly known in France back then.
Although the book is almost as much about mountaineering than about photography, I still rank it as one of the all-time classic books about photography. Now it its 10th printing, it is one of the most successful how-to photography books, called “the classiest how-to text on landscape color photography ever published” by the New York Times. As an instructional book, what make it shine is that it teaches by example. Rowell teaches not by telling you what to do, but by telling you what he did, and what he thought at the time he took the pictures. In addition, the tone throughout is remarkably informal and honest. Unlike others, Rowell doesn’t hesitate to share his unsuccessful stories.
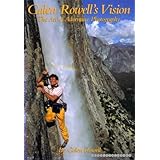 Galen Rowell’s Vision: The Art of Adventure Photography
In the later stage of his career, Rowell became an active photography educator. In 1987, Steve Warner invited him to write a column for Outdoor Photographer, which had launched two years earlier. I always considered that column to be the best part of the magazine, and judging by its popularity, I probably wasn’t alone. Galen Rowell’s Vision: The Art of Adventure Photography (1993) is a compilation of 60 of those columns, revised for publication as essays in a book. As you should expect from columns, the essays form wide-ranging musings, rather than a chapter book. Their topics cover equipment tips as well as philosophical discussions, often veering far from photography.
Part 2 (“Preparations”) include two innovative photographic techniques that Rowell used in order to extend the dynamic range to be captured on film. Many landscape photographers, including myself, credit Rowell with introducing them to graduated neutral density (GND) filters. The line of filters he developed in collaboration with Singh-Ray were at that time almost the only choice for exacting work. I remember driving to his Mountain Light gallery in Albany to purchase a set, which was handed to me by Gary Crabbe
himself. Another less known contribution was his technique of using balanced fill flash to lighten the deepest shadows in a subtle way.
 Galen Rowell’s Inner Game of Outdoor Photography
As Galen Rowell’s Outdoor Photographer column ran until his untimely death, there was enough material for a follow up. Galen Rowell’s Inner Game of Outdoor Photography (2001), the exact twin to Galen Rowell’s Vision, is likewise organized into four parts: Visions, Preparations, Journeys, Realizations. Like its predecessor, to keep it affordable, the designer found an ingenious solution.
The 66 essays are printed on matte paper, with the illustrations vividly reproduced on glossy pages grouped into blocks, cross-listed with the essays. The trim was also kept smaller than photography books.
Of the four parts, three of them are essentially timeless. Like in the previous book, the first part, discussing various aspects of perception and the creative process, provide the most insight into photography. The third part relates travel experiences in a diaristic style, whereas the forth part articulates various thoughts on publishing, conservation, and the role of photography. Only sections of the second part, about equipment and technique, may sound outdated because they are specific to slide film.
 Galen Rowell: A Retrospective
In 2002, on the same day as this post, Aug 11, Galen and Barbara Rowell perished in a small plane crash. A few years later, the editors of Sierra Club Books, Rowell’s primary publisher, compiled a magnificent tribute. Galen Rowell: A Retrospective (2006) is the only book to trace the entire arc of Rowell’s career. Numerous essays and comments are contributed by friends and associates from the many worlds that Rowell touched: mountaineering, conservation, publishing, and photography. Contemporary art is not one of them, but critic and curator Andy Grundberg writes in his essay “Rowell, with his 35mm equipment and adventurous spirit, was someone who both traveled light and traveled with the light. His faith in the revelatory powers of light as it appears on film coincided with a deep conviction in the power of images to reflect the aspiration of the human spirit”.
The 175 plates representing all the aspects of his career include most of his great “hits”. They benefit from the best reproduction of any of Rowell’s books by far, made possible by the new digital workflow which helped produce accurate colors and mitigate 35mm grain. The clean design, with plenty of white space, presents each of the seven chapters as a portfolio: The Mountain photographer, Expedition chronicles, Conserving the Wild, Asian Kingdoms, To the Ends of the Earth, Coming home, The Visionary Landscape. This sumptuous, oversize volume is the clear choice for an excellent overview of Rowell’s career. However, there is one missing component. The book was not put together by Galen Rowell, and feature little of his writing, even though Andy Grundberg points out that “what distinguishes Rowell’s photography was the pictures symbiotic relationship to narrative”.
Galen Rowell was a tremendously prolific photographer and writer, with credits over thirty books. I have limited this survey to the books on my shelf. I am sure I have missed good ones. What other books of Galen Rowell are your favorites ?
Part 5 of 5:
1
|
2
|
3
|
4
|
5