Terra Galleria Photography

Coconut Crab Hunting

Going for a walk in the forest at night and in the rain may sound like a strange activity. However, joining a coconut crab hunt turned out to be an unexpected highlight of my stay in Ofu.
Throughout our second day on Ofu Island, the storm did not relent much. Between the episodes of torrential downpours, rainfall remained steady. To our relief, in the evening, it eased to light precipitation. We had been confined to the Vaoto lodge’s communal area since the morning, but we were going to go coconut crab hunting. I first read about the creatures from the words about Palmyra Island in Pacific Remote Islands Marine National Monument that Ian Shive contributed to Our National Monuments:

Almost every day is barefoot to some degree, but the football-sized coconut crabs keep you—well—on your toes. Their pincer is the second strongest vice grip in the animal kingdom, ranking somewhere between an alligator and lion’s jaws; thankfully, they prefer to scavenge the beaches and eat the flesh of a fallen coconut (hence their nickname).
After Manaia had mentioned that he would go coconut crab hunting in the evening with his grandson George, we were excited that he let us join him. I rushed to our cottage room to grab my rain jacket, camera, and lights. During a dry day, coconut crabs stay hidden in burrows to reduce water loss from heat. They are active at night or sometimes in wet weather, so a rainy evening is the right time to look for them.

Not as inaccessible as Palmyra, yet with a tiny population of about fifty, Ofu Island is the right place to look for them. The only native mammal on the Samoan Islands are fruit bats. Coconut crabs have no predators. Their initial range corresponded to the native range of the palm coconut. However, because their meat is considered a delicacy now reserved for special occasions, they are subject to extensive hunts and have all but vanished in populated places. None are left on Tuitula, the main island of American Samoa. On Tau, Manaia’s home island which has a population an order of magnitude larger than Ofu Island, one needs to venture to remote areas to find them. On Ofu, they can be located a short stroll behind the lodge.

Despite their name, coconut crabs feed on several fruits and nuts. Coconuts are only a small part of their diet, but they seem to like them enough to sometimes climb coconut trees and cut down a coconut from it. They can open coconuts to eat their flesh, but despite their incredibly strong claws, the process can take days. A cut coconut with exposed flesh is therefore irresistible. During the day, Manaia walks into the forest and lays cut coconuts near their burrows. The hunt consists of walking back the same path at night, hoping to see a crab so engrossed with eating a coconut bait that it becomes easy prey. Despite their formidable claws, they are not difficult to catch if one knows how to handle them. To kill them Manaia needs only to reach with one hand to their underside and break the equivalent of their neck with a quick finger press.

The key is to find them at the right moment. To a westerner, the traditional Samoan method of hunting may appear inefficient compared to trapping. Mania views coconut crab hunting as a sport akin to fishing. That approach helps maintain a natural balance with the natural world. During our hunt, we found several specimens of seemingly respectable size, but none were mature enough for Manaia to catch. Coconut crabs can live up to sixty years, and reach up to nine lbs of weight and sixteen inches of body length. They are part of arthropods, a taxonomic class that includes crustaceans and all insects. Of all arthropods, they are the largest terrestrial species. One would expect to find them at the beach, however, although coconut crabs start their lives as plankton before a transitional hermit-crab phase, mature coconut crabs are land animals that cannot swim nor breathe in water – their gills are vestigial and instead they have developed peculiar lungs. On Ofu Island, they dwell in the forest.

Only minutes away from the lodge, the hilly forest terrain is tricky to walk at night as the rain makes the ground, rocks, and branches slippery. At the same time, the jungle vegetation presents constant obstacles. Despite bringing a bulky underwater strobe, I did not pack a regular flash for my camera, so I light the crabs with a flashlight in my left hand, which leaves only my right hand to hold the camera. Even using ISO values up to 12,800 I still need to compromise with less than ideal depth of field or shutter speed while the critter is trying to scurry away from the spotlight. On three different hunts, Manaia has not caught a crab of appropriate size. However, I feel privileged just to have seen the creatures in the wild, knowing that it is an experience that few had and that I could have easily missed. In a trip during which so many plans were thwarted, this unplanned activity turned out to be a highlight.

Part 2 of 5: 1 | 2 | To be continued

A Week on Ofu Island: Setbacks in Paradise

Summary: a personal account of a week on Ofu Island in the National Park of American Samoa during which carefully-laid plans were thwarted by a combination of weather, equipment failures, and transportation issues threatening to leave us stranded in the South Pacific.

My friend Tommy travels without plans or expectations. This approach, increasingly popular with some photographers, guarantees he won’t experience disappointments that can mar even a trip to a paradisiac tropical island. However, for the National Park of American Samoa (read some background if needed, a more practical write-up about Ofu will be forthcoming) it would have been difficult for me to embrace, because I had been there before and knew what I missed then. The label for my National Park of American Samoa photograph in the exhibit Treasured Lands starts as follows:

In Polynesia, a paradise-like chain of volcanic mountainous islands clothed in the greenery of old-world tropical rainforest is ringed with steep sea cliffs, glistening beaches, and biologically rich South Pacific coral reefs.
In 2002, when I visited Ofu Island, considered by many to be the crown jewel of the National Park of American Samoa, I realized that those three distinctive elements of the park could be captured in a single iconic image: a split image whose top would depict the beach and mountains, and whose bottom would be an underwater view of the coral reefs. However, the Nikonos V camera that I brought was insufficient to photograph that vision. In addition, due to unforeseen logistical problems, I could spend only two days on Ofu, one of which was cloudy, which isn’t good for shallow underwater photography. In the following decade, a few photographers captured a split image of Ofu. Only one of them, Floris van Breugel, fulfilled my vision of the iconic image. Photographs like that, which could tell by themselves the story of the park do not happen just by serendipity or immersing oneself in the moment and communing with nature.

After I decided on short notice to join Tommy for a trip to American Samoa, my priority was to try to make the photograph that had eluded me. I meticulously reviewed the previous split images I had made before in other locations to understand how they could be improved. I studied all the materials I could find about this most challenging type of photograph. I gave serious thought about upgrading my digital underwater set-up – a 15-year old Canon 5Dmk2 and 17-40mm lens in an Ikelite housing with an 8-inch dome port – and obtained a pro-deal, but after testing, for various reasons eventually decided to stick to my existing equipment. I built a custom floating board and practiced in a swimming pool. Despite the seemingly draconian weight limit for flights to Ofu, I packed all sorts of gear for underwater photography to make sure I would be prepared to deal with many situations. As another objective was to hike the trails that had eluded me, I researched them thoroughly and packed serious hiking equipment.

First day on Ofu: scouting in cloudy weather

A few days after we travel to American Samoa, we land on Ofu in sunny weather, with just a few tropical clouds in the clear blue sky. As the Vaoto Lodge is just a few steps from where the plane parks on the airstrip, it is quick work pulling my duffel bag across the lawn. I was eager to get in the water, but before we had to attend the welcome briefing from Ben, the friendly and laid-back Vaoto Lodge caretaker, and unpack our bags. I also needed to reconfigure my camera backpack to fit the bulky underwater housing and snorkeling gear. We walk along the island’s only road from the lodge to Ofu Beach. For the first one-third of a mile, the bank from the road descends steeply into ocean water. As soon as we see a beach, we scramble down. Seeing that clouds have moved in and the water appears choppy, I swim without the camera for a visual inventory. The water is delightfully warm, corals are diverse, and fish are abundant. However, due to the overcast sky, underwater views are murky and wave action ruins the visibility by stirring up the sand. It starts raining. On the way out, the surf pounds me, and I end up with sand all over my hair. Cloudy weather is not favorable for underwater photography as one needs the sun to shine into the water to light up the subjects and create contrast. Therefore, we return to the lodge, borrowing bikes to scout for a segment of the beach where the lagoon would be wider and the water calmer. Biking to the bridge between Ofu Island and Olosega Island, we stop at several locations and note the conditions, hoping to return the next day in better weather.

Second day on Ofu: storm

Those hopes are dashed when the day starts with heavy rain and wind. When it is only raining, I can enjoy a photography session despite the inconvenience of having to struggle to keep the gear dry under an umbrella. High wind makes that impractical, so we spend the entire day inside the lodge’s spacious common area. Wifi is available and my Astca SIM card provided a reliable cellular signal the day before, but today nothing works. The Manua Islands consisting of Ofu, Olosega, and Tau normally get their internet and cellular phone from an undersea fiber optic cable. Instead of having it land at a beach, they laid it over the reef where it got damaged. While repairs are in progress, they transmit data to the local towers by radio signal. Water in the atmosphere affects the transmission of the signal over the lengthy 60 miles separating the Manua Islands from Pago-Pago, the main city in American Samoa. As a result, cellular and internet are down. As it rains all day, we socialize with the other guests. Besides Tommy and I, the only other tourists on the islands are the kind family of Greg Miller, Mary, and their daughter Abi who is a park ranger at Rocky Mountain National Park. Manaia (“Nice”) and his grandson George live on Tau Island. They were hoping to catch a fishing boat for the crossing from Ofu to Tau, but in that storm, it was not possible. Walking in the forest at night in the rain may sound like a strange activity. However, thanks to Manaia, it turned out to be the highlight of our day, when he invited us to join him for coconut crab hunting.

Third day on Ofu: rain

As Saturday started with no rain, I thought of hiking Tumu Mountain since the trail will be closed on Sunday and we planned to cross over to Tau Island on Monday. However, when I see a clearing, I try my chance at the beach. As I set up to drive the truck, Manaia and the Millers asked to join and drive to the bridge. They take a while to get ready and eventually drop me off with all my photography gear in the backpack and all my underwater gear in the duffel bag at a beach Tommy and I had scouted two days before. By this time, The clearing is gone. It lasted only fifteen minutes. As rain starts, I take cover under the only shelter available along the two miles of Ofu Beach until the others pick me up a few hours later. It rains most of the afternoon and evening. Since I have already used up three of four days on Ofu without results, I am pondering extending the stay. Hawaiian Airlines has a monopoly on flights from the United States to Pago-Pago, American Samoa’s only sizable airport. The other routes home are circuitous and involve transit through at least three airports, which would be burdensome given my luggage. When I look for new flights to Honolulu from Pago-Pago, I discover that everything is sold out for the next 25 days, even though Hawaiian Airlines has added a Thursday flight for the summer to the Monday and Wednesday flights. Flights to Pago-Pago and the Manua Islands are not available every day, therefore one has to make choices when arranging a trip to American Samoa. The combined length of Ofu and Olosega Islands is less than four miles, their surface area is five square miles, and the national park consists of a stretch of two miles of beach. Because of that, when Tommy asked for itinerary suggestions, I proposed to spend a few days on Tau Island. Tau and Ofu/Olosega are less than seven miles apart, so it made more sense to cross by boat and book our Manua Islands return flight to Pago-Pago from Tau rather than flying from Ofu to Pago-Pago and then from Pago-Pago to Tau. However, it meant that to catch our flight from Pago-Pago to Honolulu next Wednesday, we would have to be able to make the crossing to Tau. Manaia had offered to join him on the boat on Saturday, but having made no underwater photographs (let alone any satisfactory beach photographs) so far, I had declined. It turned out that on Saturday the surf was still too high for a boat crossing.

Fourth day on Ofu: cloudy Ofu Beach and flooded housing

I get up at 6 am, but seeing that it is cloudy, go back to sleep. At 9 am, the weather seems to be improving. After I eat breakfast in a hurry, we drop off my bags at the beach shelter, then return on bikes for maximum flexibility. I do a quick round of beach photos on land in sunny conditions. By the time I get in the water, a cloud hanging over the mountain is shading the lagoon, so although the sky is mostly clear, no sunlight penetrates the water. Today is my first, and possibly only chance to make the photograph I envisioned. Wave action is less strong than the other day, but there is considerable current. At first, I try to fight against it, but it is impossible to stay in place, even if standing chest-high in the water. For each of my swimming passes, I walk to the west end of the beach and drift for a few hundred yards past the shelter. After several passes where I aim for over/under shots, underwater stills, and underwater video, the sky gets overcast and I feel cold. Although conditions were less than ideal, thanks to my preparation I may have gotten something. I hesitate to call it a day. One of the reasons I brought my heavy scuba-diving grade underwater housing rather than a much lighter surf housing was to use underwater strobes in case natural light was less than optimal. Since I have not yet deployed the strobe, I set up for one more pass. I am already tired, I feel hurried because it is late in the day, and I have to set up the cumbersome underwater strobe. Upon entering the water, I realize something is off and stand up immediately. The housing drains an unusual amount of water. I had failed to close one of the latches fully. Back at the shelter, I open the housing and try to turn on the Canon camera. It doesn’t. Saltwater is deadly to electronics. That evening, we moved to the Asaga Inn, whose owner, Celesty had been in correspondence with Tommy about arranging a boat from Tau. In the evening, she states that only the next morning will the boatman be able to assess the seas and decide whether he can come from Tau to pick us up. Having ruined my Canon camera, I cannot make another serious attempt at the split shot and hope to be able to move on to Tau, where there are two routes that I want to hike. In the while, it is a bit of a consolation that the location is favorable for night photography.

Fifth day on Ofu: travel delay and cloudy Tumu Mountain

On Monday, I am up at 4:45 am for some night photography and to restart a time-lapse sequence from the bridge. Celeste is also up but has not heard from the boatman. Tommy and I stay on the bridge until after sunrise, after which I launch my drone – take-offs are not possible further west because of the airstrip. Suddenly, Manaia shows up with the truck to pick us up for the crossing. Back at the Vaoto Lodge, we learn that although the seas have calmed, there are still breakers at the particular harbor where the boat is located, preventing it from exiting the harbor. There is a boat on Ofu, but the captain is out of fuel, possibly because the supply cargo trip of last week was canceled. We called Samoan Airlines eight times to inquire about the Tuesday flight. Only one time someone picks up the phone, and after Manaia talks with them in Samoan, they transfer the line to the relevant desk which does not answer. Tommy is not surprised, since in the lead-up to the trip, he spent more than $80 on long-distance calls, most of them consisting of being on hold. Waiting for updates from the boatman means having to stick around the lodge instead of going about our day. I have never packed a laptop on any of my photography trips before, but for this one, I made an exception because I wanted to be able to review the split shots to make sure that I nailed them and correct any mistakes if necessary. During the downtime, I try to access the Canon’s Compact Flash card from the laptop. It is dead. Unlike SD cards, which are waterproof, CF cards have many openings for pins that make them vulnerable to water. I have no underwater photographs. The feeling of failure sets in. Past 1 pm, Manaia announces that there will be no boat today. Although it is cloudy, I decided to hike Tumu Mountain. Manaia drops me off at the trailhead at 2 pm. Previously, he had asked if I needed a machete. Two visitors replied the same as I did, that if they needed one, it would be time to turn around. They ended up turning around quickly. However, I find the lush rainforest trail easier to follow than expected even though I often need to duck below branches. Two hours later, in sight of the radio tower, I realized I had missed the junction for the overlook. Going down, I find the junction marked with pink tape and hike the faint trail to a single fixed rope, arriving at the overlook at 4:30 pm. Action and a relative sense of accomplishment have helped me get past the disappointment of the lost water photos. Even in cloudy conditions, the view is great, maybe among the top ten park views. To the eye, the colors are a muted grey, but they are there and Lightroom color slider moves of 10 units are sufficient to reveal them. Less than an hour after my arrival, low clouds obscured the view entirely. It starts raining, sometimes heavily. The umbrella is not useful since I need to use the hiking poles, and as my glasses get wet, I struggle to see well in the dark. Arriving early at the trailhead for the arranged 7:00 pickup, I walk to the pier from where the sea looks navigable. At the Vaoto Lodge, eggs and tofu have run out, so I content myself with peanut butter as the sole protein source.

Sixth day on Ofu: travel delay and cloudy Ofu Beach

I wake up at 5:45 am on Tuesday and photograph in cloudy conditions until 8:30 am. Back at the lodge, I pack hastily and drag my bags to the airstrip where we bid farewell to the Millers and try without success for stand-by seats for the 10 am flight. A new guest, Whitney Lauritsen, a woman of many talents, arrives. She is on a quest to visit all the parks and is missing only the Virgin Islands and Alaska. Fed up with wasting time at the lodge waiting in vain for the news from the boatman, we head out to the bridge in sunny conditions. By the time we are back to the national park beach, the clouds darken the waters again. I had packed up a backup underwater camera, the Sony RX100 in a Meikon housing with an additional Inon wide-angle lens. The water is calmer than on Sunday, but the current is still strong, so I go for a drift snorkel with Whitney. On the first pass, I notice a strong left-side vignetting on all images. Examining the housing on the land, I find that two small rubber pads are missing, causing the camera to be misaligned. I cut a rubber band from my camera emergency kit using the survival tool in my camera bag and installed it in place of the pads. On another pass, pictures suffer from fogging. Having not used the Meikon housing for years, I had forgotten that the Inon lens is best used with water filling the space between the lens and the housing. My last pass takes place around 5:30 pm, without a strobe, I crank ISO to 1600, but shutter speeds are still marginal, so I call it quits. Tomorrow, we need to catch the flight from Tau in the morning, otherwise, we won’t be able to make our return flight from Pago-Pago. Because of his trade as an electrician – despite having majored in at UCLA, Manaia knows everybody in the Mauna Islands, yet he has not been able to secure a boat passage to Tau in five days. As we go to bed without hearing a word from the boatman, Tommy and Whitney plan to hike the next day to Tumu Mountain. Since Tommy wanted to start at 6:30 am, I was thinking that if I joined them for a chance at better light than I had, I could return to the beach at midday.

From Ofu to home

At 8:15 am on Wednesday, George yells that the boat is at the pier. According to plan, we would have been on the Tumu Mountain Trail, but Whitney needed to finish some client work in the morning. Since we did not hear from the boatman in the morning nor the evening before, Manaia packs in a hurry. By the time we get to the pier, it is almost 9 am, making it certain that we will miss our flight at 10:05. The harbor is on the west end of Ofu, so we need to navigate 12.5 miles of ocean, which takes about an hour. The seas are rough, but the ride with the fishermen is fun. Although I try to shield my A7R5 camera from water splashes, it still gets wet. Since the second day on Ofu, my A7R4 kept stubbornly displaying an error message “Accessory not compatible” even when the lens and battery are from Sony. After I dismissed the message, I had only a few seconds of respite before it popped again. Now my A7R5 is also afflicted by this behavior (note: after a week in dry California weather, both cameras appear to have recovered). This adds to a litany of equipment issues, as during that trip, I also cracked my expensive and hard-to-replace Firecrest polarizer and my previously reliable Induro tripod developed the dreaded floppy legs syndrome. In addition, both of my wide-angle and normal zooms often developed internal condensation resulting in locally lowered contrast. At the harbor of Faleasao on Tau, we hitchhike on a truck that takes us to Siufaga from where we have a better chance of catching a ride across the island to Manaia’s house. A third ride on the back of a truck takes us to the airport around 11:30 am. The airline agent mentions an afternoon charter flight, so we hang out. Passengers begin to arrive, but suddenly it starts raining torrentially. The plane was on its way, but due to poor visibility at the Tau airport, it turned around and landed in Pago-Pago. After more waiting, we learn that the flight has been canceled for the day. We were so close to having made it. Manaia offers us to stay at his artistically decorated home next to the beach where he demonstrates the meaning of Samoan hospitality. On my 2002 trip to American Samoa, although I had spent involuntarily five days on Tau, the lack of information caused me to miss the difficult and seldom-traveled trails to Lafauti Fall and Lata Mountain. One of my goals on this trip was to hike them, but that won’t happen. Because the rain has resumed, we don’t even attempt to visit the national park.

After all those setbacks, things suddenly work in our favor on Thursday to get us home. At the airport, we meet Eseta, the charming homestay host with whom we would have stayed if we had reached Tau on schedule. She mentions that in June, the Park Service will start rebuilding the trail to Lata Mountain for which I had envisioned hiring guides to cut the way up with machetes. The charter flight is not full, and the person who commissioned it agrees to let us ride back to Pago-Pago with them. At the Hawaiian Airlines office, Tommy miraculously obtains guaranteed standby seats. We spent the rest of the day touring the western part of Tuitula Island with Whitney, during which I rebooked my flight from Honolulu to SFO, whose cost in miles has ballooned to 31K. The last moment of concern comes at the departure lounge. The Hawaiian Airlines agent had handed me out a boarding pass without a seat assignment, with instructions to wait for my name to be called. All the other passengers, including Tommy, are seated in the airliner, it is past flight time, and they still have not called the names of the passengers to be assigned seats. I am eventually given a boarding pass with a window seat next to Tommy. It all worked out and I got home on Saturday, which was not a given. I was so concerned about how to get out of the islands, but in retrospect I felt privileged just to have been there. Although difficult in the moment, despite all the unrealized plans, the trip to American Samoa worked out as a great experience, and as a preparation for the next one. I even made a few split photographs…

Part 1 of 5: 1 | 2 | To be continued

Landscapes where I Live, Monochrome vs. Color

After chasing the light and seasons in national parks across the country, a few months ago I released the first installment of a new body of work: twenty-five landscape photographs made where I live, which means in public lands within half an hour from home. This follow-up presents twenty-five more monochrome images from that body of work. It is uncommon to juxtapose monochrome and color versions of the same images, but that is the main gist of this post, which also presents the color versions. Despite being rich in images and light on words, I hope it inspires thoughts and would love to hear from you.

In the first installment of this series, I showed only the finished black and white photographs and asked whether you thought they missed “something” by being monochrome. That something was left to the imagination. It could have been many things beyond the presence of color itself. In black-and-white photographs, viewers use their imagination to infer not only what the colors might be, but also what facts they may convey, for example in this series the season of the year, and what emotions or moods they might evoke. The question mobilized the power of imagination in creating a complete and vivid experience from a seemingly incomplete visual representation, which is something that generally one does more when viewing black and white photography, although it is a task prompted by all photographs. That’s positive since imagination transforms the act of viewing photographs from a passive activity into an interactive and deeply personal experience. However, this made answering the question even more subjective.

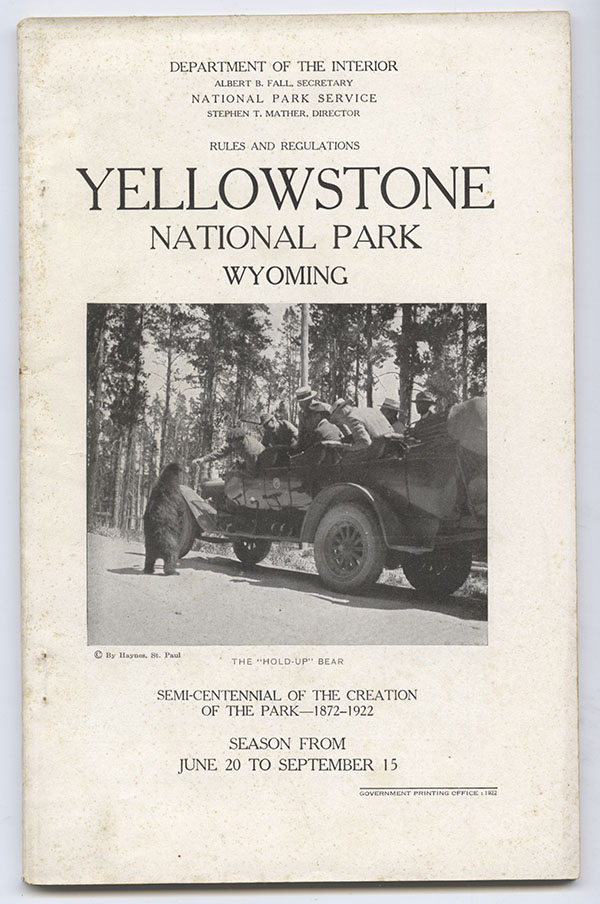
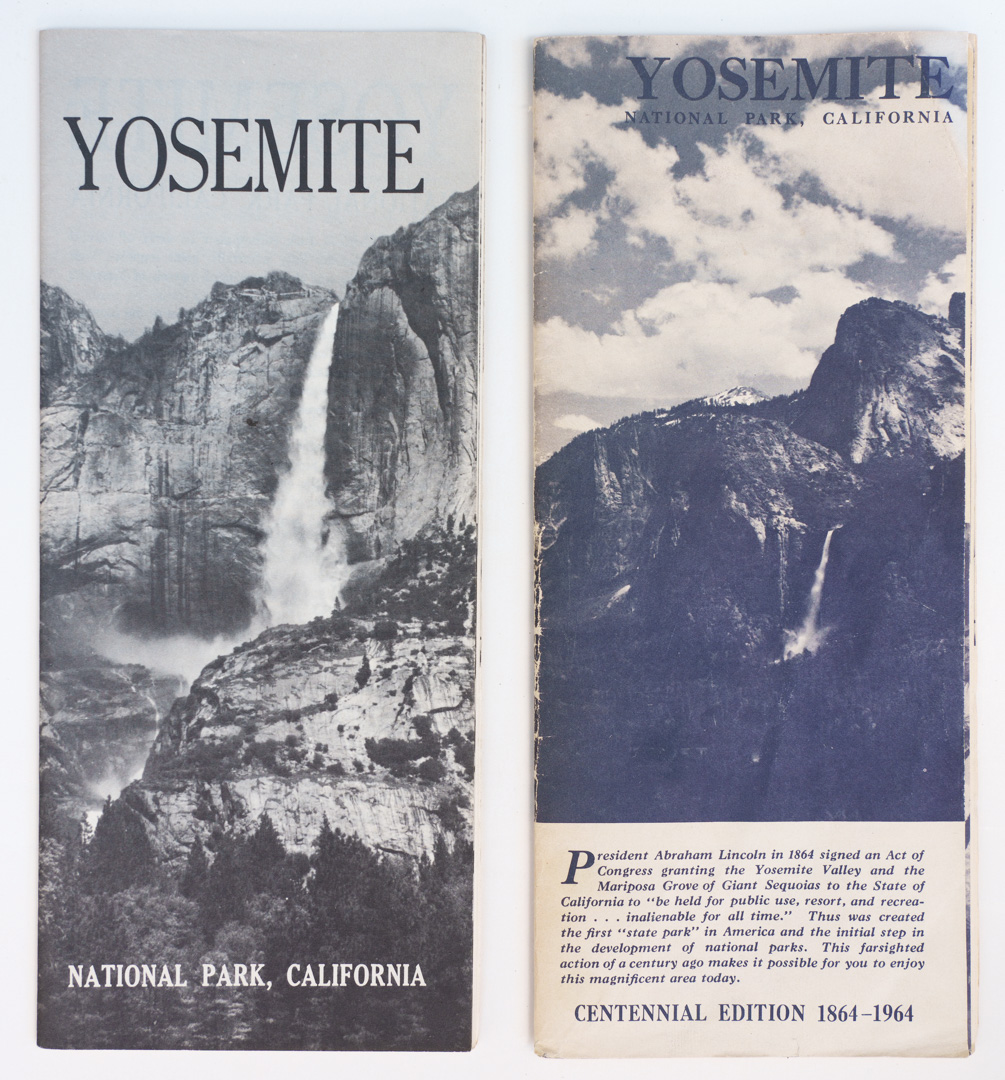
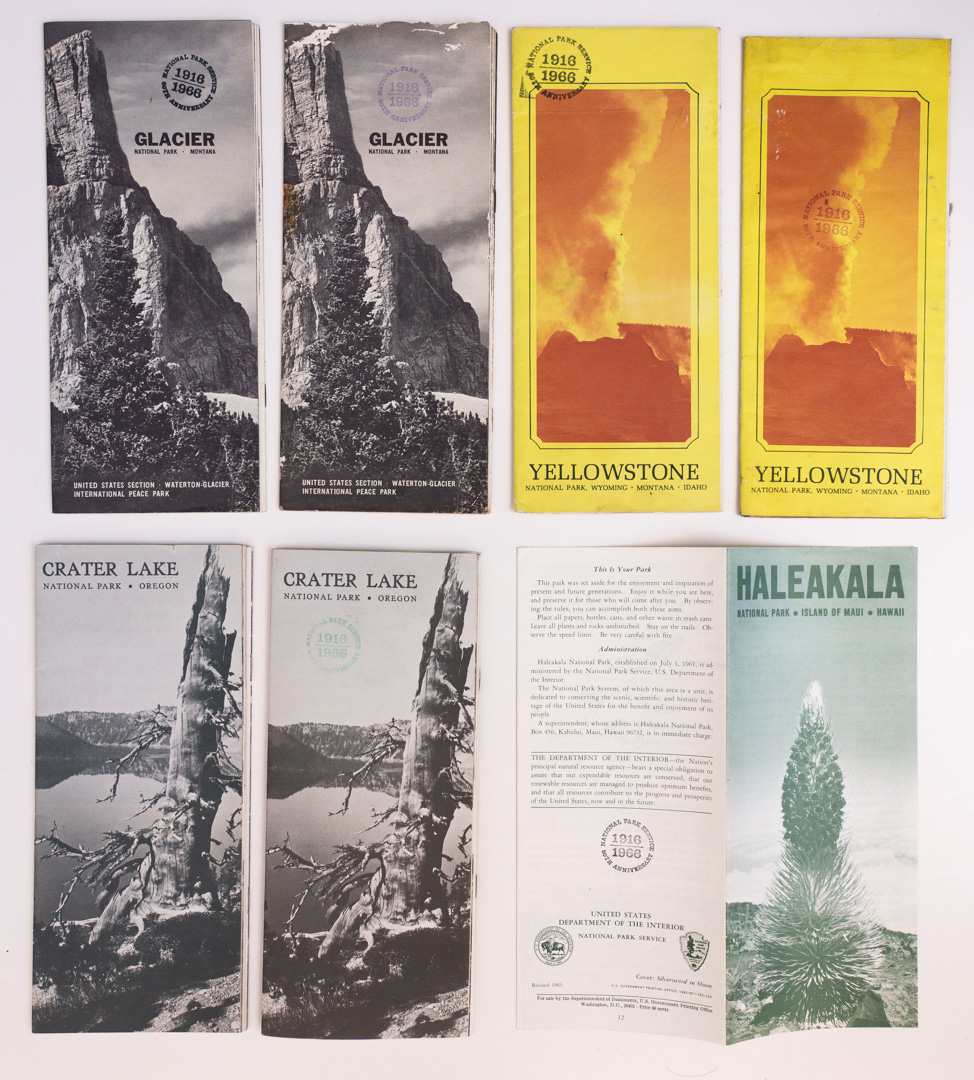
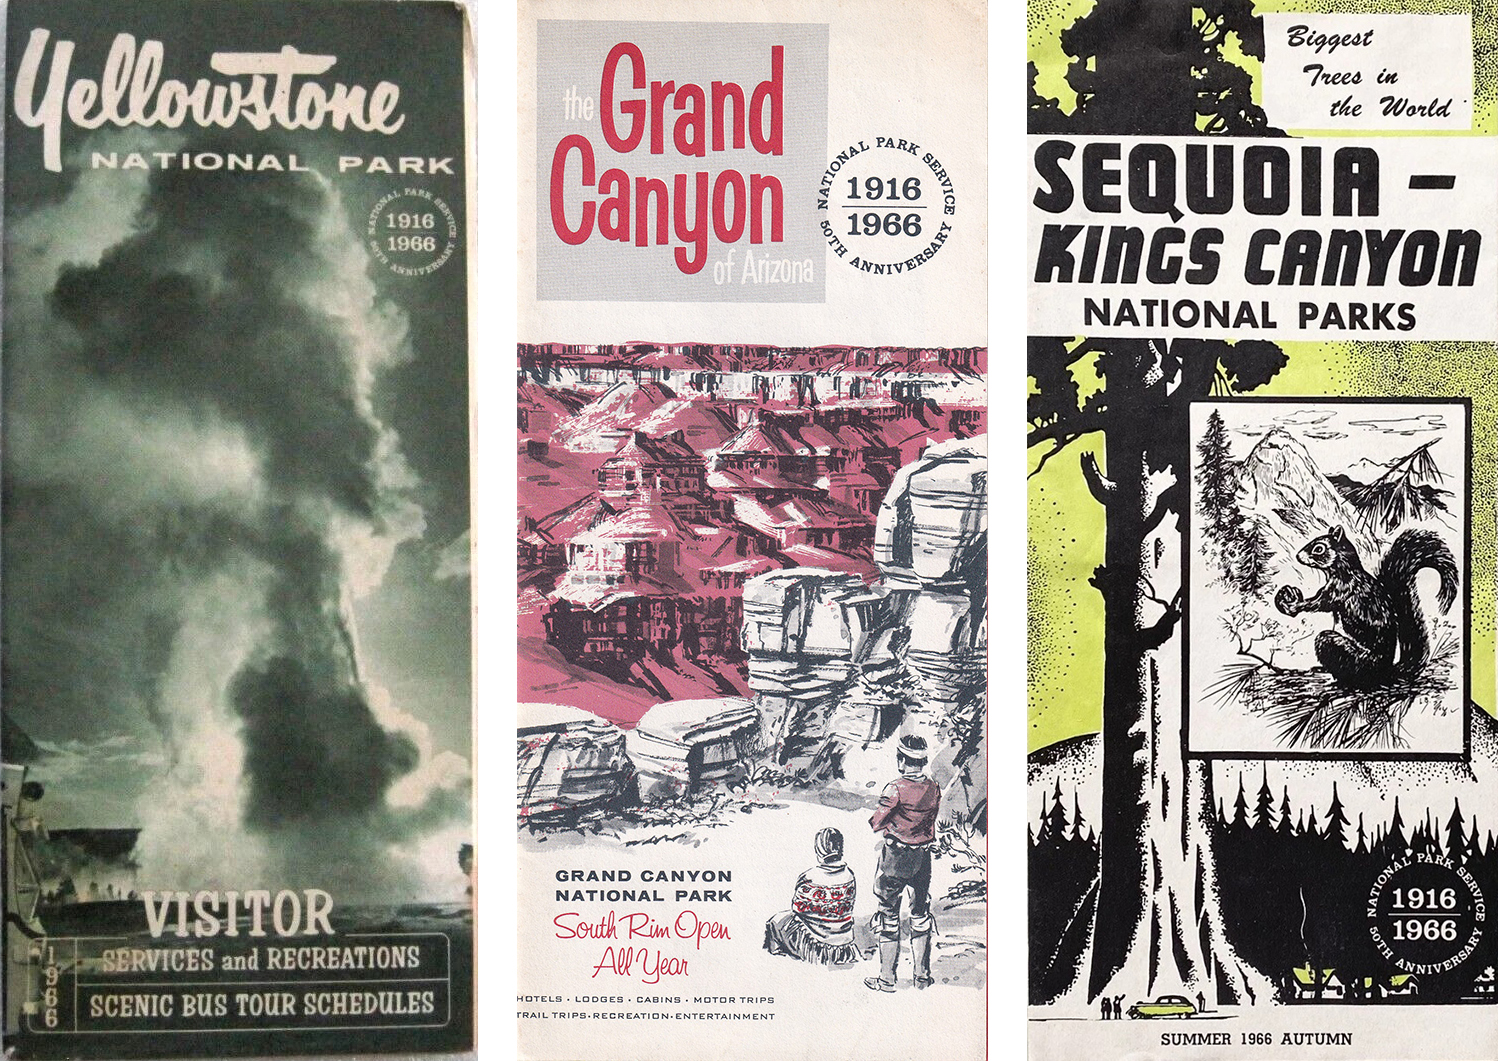
Back in the 1960s, black and white was considered the language of art photography, whereas color photography was the domain of commercial and casual photography. In the realm of nature, even by the mid-1970s, most of the visitor brochures issued by the National Park Service used monochrome photography, although they were printed in color! The photographer Joel Meyerowitz was one of the pioneers in ushering color photography acceptance into the art world. Meyerowitz initially worked as a street photographer, a genre that remains associated with black-and-white photography even nowadays. In the 1960s, he began to carry two different cameras to photograph the same scene in black and white and in color with different films. The personal experiment changed his practice, and he subsequently photographed exclusively in color, also switching to large-format photography. Despite its impact on the history of the medium, his juxtaposition of the monochrome and color images, whose compositions were not identical, was published only this year as A Question of Color (2024). Except for a few specialist cameras that produce a monochrome file, all digital cameras generate a color file. The creative potential of mixing color channels to generate a black-and-white image largely outweighs the slightly higher resolution of the monochrome cameras. Since I photographed with a standard digital camera, my black and white photographs originated in color without having to use two cameras like Meyerowitz. In this post, I am presenting both as a modest modern-day version of his experiment. Here are the color images from which the images above in this post originated:

Now that you have seen the two versions, instead of imagining one of them, do you think that the monochrome photographs in this body of work are missing something that was in the color version? I understand that the most nuanced and precise answer is “it depends on the image”, but I am still going to ask you to evaluate the body of work as a whole. I would be grateful if you answer the two questions below, and even more so if you would say why you think so in the comment section. As with every time there is a poll I may not comment further to avoid influencing answers, but will follow-up in a third installment.

click here if you don’t see the questions below

Caddo Lake: A Quick Guide to the New Premier Photography Destination

The most emblematic landscape of the American South is the flooded forests growing out of the water. One of them have recently emerged as one of the premier destinations for nature landscape photography. Two telltale signs are the number of photo workshops that frequent them, and the busloads of Chinese photographers who descend in prime season. This territory had been known for a while. I photographed in the Atchafalaya in the mid-1990s and David Muench’s Ancient America (1997), one of his most accomplished books, features quite a few images from that environment.

However, it seems that what caught the attention of the current crop of landscape photographers were the surreal russet-red fall colors which happen in the extraordinary context of interestingly shaped grey bald cypress and Spanish moss reflected in still waters and sometimes enveloped in a wisp of mystical fog. This post doesn’t feature this kind of pictures since I was there at the “wrong” time, however it includes the information I collected during my visit, which should an excellent staring point to help you start planning your own.

Although flooded forests of bald cypress can be found in all southern states from Texas to South Carolina, the one that has recently become the most popular with photographers is Caddo Lake. It is the largest natural lake in Texas (60 square miles) and also extends to Louisiana, a state with which its landscape is more often associated. Caddo Lake’s claim to fame is that it is lined up with the largest flooded forest of bald cypress trees in the world. Despite that, it is a quiet, rural, and relaxing area lined up with waterfront properties but no large-scale development. The location is about 200 miles east of Dallas, TX, and 40 miles northwest of Shreveport, LA, which is the closest airport.

When to visit

The bald cypress is one of the few deciduous conifers, like the alpine larch, which is why it produces great colors in the fall, generally late October to mid-November. From December to March, the trees are bare, and since the Spanish moss that adorns them are grey like the trunks, well, the landscape is quite grayish. They barely started to leaf out in early April, when we were in Texas for the eclipse of April 8, so our timing was not ideal. A few more weeks later, there would have been more tender green on the branches. In late spring and summer, the trees and lush and the lake covered with blooming aquatic plants. Unless it is a cloudy day, which is always good for forest photography, you would want to be out around sunrise and sunset. Even without spectacular foliage, a cluster of bald cypress and reflections silhouetted against a colorful sky is a beautiful sight to hold.

Where to stay

The low-profile community of Uncertain, TX is located next to the lake but has just a few small eateries and convenience stores. Accommodation is limited to rental houses (Airbnd/Vrbo) by the lake, including Spatterdock Guest Houses on Taylor Island which feature whimsical art installations and a nice boardwalk. Caddo Lake State Park offers cabins (be prepared: no linens, pillows, towels, or kitchenware) and campsites. Fifteen minutes away, Jefferson, TX is and quaint and charming town with cobblestone streets, historic buildings and tourist amenities such as nice restaurants, hotels, and shops. Marshall, TX and Shreveport, LA have more amenities but are further and bland.

Exploring by tour boat

Most of the shore of Caddo Lake is not public land. Given the size of the lake, it is best explored by motorboat. There are at least a dozen of operators around Uncertain that can take you on the lake while narrating its history and natural features. Most boat tours start from Johnson’s Marina, but Mike from Ole Jigger launched from his own boathouse in this backyard. Guides generally use pontoon boats with room for about ten which are stable, comfortable, and spacious enough to deploy a tripod if your group is not too large. The standard tour lasts 1h30 to 2h, during which we covered a lot of ground. I was impressed how our captain so easily navigated without aid the maze-like flooded forest. The ability to easily cover large distances would be helpful in finding great fall color. Sunrise and sunset tours are commonly arranged, but since it was a family trip, we went in the mid-afternoon and I considered it to be scouting session. When making advance arrangements keep in mind that many guides are hired by photo workshops planned more than a year in advance during the prime season.

Exploring by paddle

Paddling a canoe or kayak provides a more active and intimate experience of the flooded forest. It was a fun and relaxing family activity for us, and if your goal is photography, it is a good way to find a variety of angles and viewpoints unconstrained by the limitations of the shore or of being in a group with others on a boat. It is a pretty safe activity since the water is only waist-deep. Some photographers even deploy a tall tripod next to their watercraft, but with modern cameras, handholding or resting our camera on a folded tripod in the boat is enough. Life vests were provided, but are optional for adults. The only real hazard is getting lost if you go far. There are two areas where the waterway is small and enclosed enough not to be bothered by the wake of motorboats and where rentals are available: Benton Lake and the smaller Mill Pond. For Mill Pond we rented metal canoes sitting three at the entrance station of Caddo Lake State Park. The park provided us with a key to unlock our canoes and open the boathouse where paddles and life vests are stored. I could easily use a regular camera bag in the stable and wide craft. Although I am equipped with all sorts of waterproof camera systems, I don’t plan to bring any on a future trip. Ole Mossy Rental near Benton Lake provides more choices, as they also have modern plastic kayaks of the sit-on-top type that you could transport on your car to other waterways. Those are good for solo riders and are more easy to maneuver but not as stable as canoes. You could also rent at Johnson’s Marina and Shady Glade Resort and explore the nearby areas of Caddo Lake. I have been told that during the prime autumn season, some of those rentals can be sold out.

Exploring by foot

If you prefer to have your feet (and tripod) firmly planted on the ground or just to keep things simple, the best bet is Caddo Lake State Park. The boat launch provides access to a sizable channel of the bayou, and there are hiking trails, but by far the most photogenic area is Mill Pond, which you can photograph from the shore or from two piers, mainly the larger one. Although small, the area offers a lot of possibilities and can be accessed at any time of the day.

While my family recuperated from our travel from San Jose the previous day by sleeping late, I came to the pier at dawn. There was only another person there, but I imagine that in the prime months, this spot could become quite packed, and vibrations could be an issue. I was rewarded with a thin layer of mist above the water surface which was gone shortly after sunrise. I made all my compositions from the pier with a super-telephoto lens. With only a few accents of green, the scene was almost monochromatic, but for a short period after sunrise, the sun backlit the Spanish moss with a golden glow. Even when you come at the wrong time of the year, there are always photos to be found at Caddo Lake!

The Best National Parks Guidebooks

National Park Week is upon us. My past write-ups acknowledged the role government and citizen organizations played in protecting our national parks. One of the takeaways from Ken Burns and Dayton Duncan’s The National Parks: America’s Best Idea was that their establishment also owes much to the tireless efforts of individual dedicated conservationists. However, the legacy of our national parks is not solely shaped by their creation but also by the ongoing work of individuals who help visitors navigate and appreciate their wonders. Although unheralded, guidebook writers have offered invaluable guidance and insight to readers. Through their meticulous research, they have enriched the experiences of countless people, including me.

Today, I will highlight the books of one guidebook writer, Michael Joseph Oswald, and briefly compare them with some other favorite park books for context. Besides his accomplishments, Michael is a kindred spirit and generous person who helps promote other creatives and small business owners in the national park space. I contacted Micheal in 2016 with questions about book distribution, which he answered by phone and email. His referral led to an offer from his distributor, but I signed up with Ingram instead, and a few years later, Michael made the switch, so our books are now distributed by the same company, PGW (part of Ingram). Our more important commonalities are that we single-handedly author books that cover all 63 U.S. National Parks with writing, photographs, and maps. We both self-publish. Although one would think that our one-man operations make it impossible for us to compete with well-established publishers, Michael’s Your Guide to the National Parks sales have been comparable to the National Geographic’s classic Guide to the National Parks, while Treasured Lands is the best-selling photography book about the national parks, currently in its 8th printing.

Your Guide to the National Parks (now in its third edition) was a remarkable debut book in 2012 given its encyclopedic scope. Larger and with more information in it than in any other guidebook, there is something for everybody: history, fun facts, top sights, itineraries; tables with lodging, camping, and trails; weather; readable and useful maps; and resources. Yet, the book reflects in its superior organization the analytical mind of a former engineer. The main shortcoming of other park guidebooks available at that time was that they were mostly for automobile touring. Even the best of them, National Geographic’s Guide to the National Parks was structured around road itineraries. By contrast, Your Guide to the National Parks rightly emphasized hiking and other outdoor activities. Michael may have single-handedly shaken the industry, as the new park guidebooks available today have followed his approach. For example, the more recent National Geographic’s Secrets of the National Parks, which doesn’t reveal secrets, is a marked improvement but does not try to be comprehensive. Moon USA National Parks offers an excellent balance of information and inspiration through design and high-quality photographs. Speaking of photographs, more than forty of mine were included in the National Geographic’s guide pictured above. On the other hand, unlike others, Your Guide to the National Parks uses photos from free sources – demonstrating why “pro” landscape photography still has a place. Regardless of how the industry as caught up, Your Guide to the National Parks continues to distinguish itself from other guidebooks by being mostly the product of his travels park-to-park, doing the activities described in the book, and collecting testimonials from park rangers and visitors. There is something special about a single voice speaking from experience. Like me, Michael traveled frugally, sleeping in his car and tent. His book is offered at an incredibly low price for what you get, a 7.25″ x 8.75″ book of 724 pages – again not unlike Treasured Lands.

Compared to other guidebooks with a trim of about 5.5″ x 8.5″, the maps in Your Guide to the National Parks are more readable, but National Park Maps: An Atlas of the U.S. National Parks takes it one step further. In that book of trim 10.75″ x 13.5″ maps are reproduced 30% larger than the 8.25″ wide unigrid brochures provided by the National Park Service, which given the density of information in the NPS maps, is useful. Unlike the National Geographic Atlas of the National Parks, which is a hefty coffee-table full of great photos, fascinating narratives and data but includes passable maps, the meat of the portable and inexpensive National Park Maps are the maps, together with some eminently practical visitor information, driving distance tables, favorite lists, and itineraries. The author has been criticized for “plagiarizing” the National Park Service (NPS) maps, but I think he made the right choice, as those maps are the most informative around, a testament to the excellence of the NPS media services. Since those maps are public domain, like everything produced by the U.S. Government, there is no need to reinvent the wheel and end up with worse maps as other publishers have done in their books. Besides, Michael has added a layer of information, and in some cases has improved the maps themselves. Witness how the NPS maps of Redwood National Park, Cuyahoga Valley National Park, and Indiana Dunes National Park all lack shaded relief, and how National Park Maps has remedied that shortcoming. NPS maps can be downloaded from nps.gov or the more user-friendly repository npmaps.com, and if you contact a NPS unit, they will generally (but not always) mail you the relevant brochure/visitor guide/map. Still, the convenience of having all the maps in an atlas and the bonus information make National Park Maps worth it.

One of the strengths of Your Guide to the National Parks is that it provides more hiking information than other guidebooks. The Dayhiker’s Guide to the National Parks expands on that aspect. I believe parks are best experienced on foot and directly immersed in nature, and due to the weight of my camera equipment, I generally favor day hikes over backpacking trips. Therefore, it is the book I wish I had when I first started visiting America’s national parks. I have already mentioned that other guides to all the national parks tend to emphasize driving tours. There is now an abundant literature of hiking guides devoted to the trails of a specific park. Falcon Guides covers many areas, but the best guidebooks are locally self-published, such as Eric Stensland’s Hiking Rocky Mountain National Park. Yet for someone on a national park trip, those books offer overwhelming options, and several books would be needed. Instead The Dayhiker’s Guide to the National Parks presents a carefully curated selection of 280 trails, expertly described and mapped, ensuring that hikers can experience each park’s highlights on day hikes. The book serves as a comprehensive, yet self-contained, concise, and portable guide (a small paperback with rounded corners) to all the parks. The 198 topographic maps within are sufficient to follow park trails since they are generally well-marked. Robert and Martha Manning’s Walks of a Lifetime in America’s National Parks is in the same spirit, offering a selection of trails in each national park from a pair of veteran hikers, but it lacks maps or precise information such as elevation gain, and its format of soft-cover coffee-table book is not as practical.

Besides those just mentioned, I own an entire shelf of national park books (some reviewed here and here). It is a rare instance when browsing does not lead to new ideas for places to explore, as each author emphasizes their interests. For photography location information, my two main sources of information are not specific to national parks, although the national parks are prominent among the locations described. In the past, I have subscribed to Robert Hitchman’s Photograph America Newsletter. He has been publishing them for 35 years without missing a beat, and the complete collection is an excellent value with solid information. The Phototrip USA series is excellent, and in particular, the three Southwest volumes authored by Laurent Martres are by far the most detailed and comprehensive resource on photographing that region. It is a work whose breadth and depth are unlikely to be replicated by anyone.

Ansel Adams is of course revered for his masterful photographs of Yosemite, which he published in many popular books. However, his first publication about Yosemite was not a photography book, but rather the Illustrated Guide to Yosemite Valley (1940) authored together with his wife Virginia and later expanded into the Sierra Club’s Illustrated Guide To Yosemite (1963). Preceding Michael’s approach before his lifetime, the Adams conceived the guidebook as being about “ecological recreation – something to be enjoyed best when one gets out and walks”. As we expect from Ansel, included are notes on photography, described as a way of “crystalizing” one’s experience. Since the books on my shelves have enriched my experience of our national parks, I have tried to pass that forward, envisioning Treasured Lands as an informative and useful book. Even though three-fourths of the pages are filled up with photographs in a design that honors them, I managed to squeeze in 140,000 words. Of all the feedback I received from readers, maybe the most gratifying has been to hear that the book enriched their experience of our national parks. I hope that one of the books mentioned in this article will do that for you.

Focus on the Solar Eclipse of April 8, 2024

Since the total solar eclipse of April 8, 2024, would be the last in America until 2044, my main motivation was to witness the event as a family. This called for a different approach than the one I took for the eclipse of 2017. I had traveled with my younger in-laws to Grand Teton National Park, where on eclipse day we undertook a strenuous hike to a mountain summit with prime views of the Tetons. Such an inspiring setting could not be surpassed given the 2024 eclipse trajectory, but for the photographs I was planning to make, this would not matter.

Sticking with Texas

I thought of Niagara Falls or Newfoundland where the sun would be lower in the sky, but my wife Lanchi does not like the cold. Texas appealed since she had not traveled there before, it is the closest to California with plenty of amenities, is warm, and more importantly, its dry weather made it the most likely state to feature clear skies among all those on the path of totality. It was a popular choice. The day before the eclipse, at the cow parade in Fort Worth, TX, the MC proceeded with a demographic survey. Judging by the replies and raised hands, as many had come from out of state and abroad as from Texas.

We were initially aiming for a quick trip, but when I started to look for flights to Texas in January (too late!), all the dates close to the eclipse were unusually expensive. Driving from California was not a great option since our children had only limited time because of college – eclipse day fell after Spring Break. To minimize expenses, we planned to fly in well ahead of the eclipse, and out several days afterward. On the day of our flight, clouds were predicted for the entire state of Texas, whereas, improbably, the weather for New England where my in-laws were heading was predicted to be clear, but at that point good flights were so costly that we stuck to our initial plans, thinking that even if the eclipse did not work out, it would still be a pleasant trip.

We had secured a lodging reservation for the evening of the eclipse in Austin, TX. On the weekend before the eclipse, we had made it to Hot Springs, AR, home to Atlas Obscura’s Ecliptic Festival, and also the smaller National Park Service’s “Eclipse Fest!” on Arlington Lawn. Both cities and the main highway between them were on the path of totality. We could therefore choose an eclipse site anywhere along a 500-mile stretch. The short-term forecast predicted clouds anywhere along it, but it appeared slightly better for Arkansas than for Texas. When we took a vote, the children opted to try to watch the eclipse in Texas, as there is more to do there. They had seen enough of Hot Springs National Park. It was an ironic coincidence that the other national park on the path of the eclipse, Cuyahoga Valley National Park, shares with Hot Springs the dubious distinction of being frequently ranked among the “worse national parks”, while another frequent contender, Gateway Arch National Park, was at 99% totality.

Eclipse Day

The planned eclipse viewing location was by a lake in a Texas State Park. It was reasonably scenic and promised a quieter experience than urban city parks, an important point for Lanchi, who didn’t want crowds. It helped that entry was subject to reservations with quotas – unlike California and federal parks, Texas charges per visitor and not per car. However, on the morning of the eclipse in Fort Worth, TX, the sky was almost entirely cloudy, and Lanchi thought that the weather would degrade as the day went on since thunderstorms were predicted for the evening. Losing belief in our chances to see the eclipse, we abandoned our plans to go to the State Park. For an ongoing project, I had wanted to photograph at Waco Mammoth National Monument, and since it is close to the totality centerline, we thought we might as well head there. On the highway, the weather was overcast. At the entrance, we saw cars turn around after speaking to a ranger, which made us worry that the park was full, but it turned out he was telling prospective visitors that there was a long wait to get into the dig shelter.

The park service distributed free eclipse viewers, closed the dig shelter for the eclipse duration, and let people park on one side of the road. After strolling to the other side of the road with our picnic blanket and shade umbrellas, we settled on the grass with a good view of the sky. It was relaxing and convenient, the only drawback being that the area was too forested to provide views of the horizon and its 360-degree sunset.

We were concerned that if we gave up our parking spot, we may not be able to find a better one elsewhere. Since when we arrived, the clouds were prevalent and the sun poked out of them only occasionally, I did not attempt to record the phases of the eclipse. But at least, things were looking up since we sometimes saw the sun. Being under trees, we observed the leaves forming natural pinholes that projected crescent suns on my daughter’s sketchbook.

Just five minutes before totality, the sun was hidden by a dark cloud, but it looked like it could emerge. It did, and we had a clear view of the eclipse. What a stroke of luck! I subsequently read the same occurred in Dallas and Austin, maybe because the eclipse cooled the air, helping dissipate the clouds. Later in the afternoon, by the time we arrived in Austin -without the anticipated traffic delays-, it started raining.

During a total solar eclipse, people on Earth witness a rare phenomenon: the sun’s outer atmosphere, called the corona, becomes visible. Ordinarily, the corona is obscured by the intense light emitted from the sun’s surface. However, during the brief period of totality in an eclipse, when the moon completely covers the sun, the corona emerges, appearing as a radiant white halo encircling the darkened moon. It could be that on that day, there was some diffuse cloud cover because while the inner corona around the sun was bright, the streamers extending further from the sun were faint, at least compared to the 2017 eclipse – the 11,000ft elevation of our mountain top viewing site may have helped with air purity. Refer to the next section for photos that show more of the corona.

Scientists anticipated that this particular eclipse, occurring during the peak of the sun’s 11-year activity cycle, would offer unique views. Their expectations were fulfilled as the sun exhibited spectacular prominences, which are massive loops of plasma extending from its surface. The largest of them were visible to the naked eye, whereas in 2017 I didn’t remember seeing any. Solar prominences appear reddish due to their plasma originating from deeper layers of the sun’s atmosphere, specifically the chromosphere. This layer is characterized by high-temperature hydrogen emissions that emit red light. These prominences, which made this eclipse special, were faintly captured all around the moon’s outline at the beginning of totality (photo above). As the moon moved over the sun, some of the prominences became obscured, while others became more visible.

The edge of the moon is not a smooth circle because the moon’s surface features peaks and valleys. The most pronounced prominences were located near the bottom and right edges of the moon’s outline at the end of totality, and they were bright enough to be visible even at the “diamond ring” phase when the sun began to reappear.

Photographing the Eclipse

That the surroundings were not anything special wasn’t an issue for the rest of the family, and also for me. In 2017, I focussed my efforts on capturing the eclipse within the landscape, which was as spectacular as it could be. Using wide-angle lenses remains my preferred option, as it reflects more of my experience, the connection of the sky to the land, and offers creative composition options. However, the 2024 eclipse occurs close to midday (1:40 pm) when the sun is high, and the landscape of Central Texas is not exactly superlative. Therefore, this time I tried my hand at capturing a close-up of the sun with a telephoto. I brought two Sony cameras, one with a 100-400mm lens with 1.4 converter mounted on a beefy series 3 tripod for stills, the other with a 70-300mm lens on a series 2 tripod that I planned to use to capture the eclipse in cropped format video. I was hoping that the stills would capture a wide range of brightness, whereas the video would provide the temporal resolution – and could also be converted to time-lapse.

Photographing a close-up of the eclipse is quite challenging. With a telephoto, the sun moves surprisingly quickly in the frame, and even locating it is not as obvious as it may seem. The exposure range for the different elements of the eclipse is wide. At my settings of ISO 200, f/8, here are the ideal exposures: diamond rings 1/4000s, prominences 1/2000s, inner corona near the sun 1/125s, outer corona 1s, which represents a range of 12 f-stops or a range of brightness of 1 to 4000. In addition, when you photograph the eclipse with wide-angle lenses, no filter is necessary, but with telephotos, a solar filter is required to avoid damage to the camera sensor during the partial phases. The filter is extremely dark, usually optical density ND 5.0, which translates to a transmittance of 0.001%, or the equivalent of 16 f-stops. Needless to say, it changes the exposure most dramatically and has to be removed during totality. Both of my filters were made by stretching Baader Astrosolar film over square mounts. I had planned to use the partial phase for practice, but the clouds had prevented me from doing so. When the sun began to emerge, I was still fine-tuning things, which put me in a rush. Consequently, I forgot to remove the filter from my second camera. During the flight from California to Texas, I refreshed my memory by browsing Alan Dyer’s eclipse book, probably the most comprehensive resource on the subject. As the author cautions against any setup where you have to remove the solar filter on more than one camera, I asked Lanchi to remove the filter from the second camera. However, in the excitement of the moment, she also forgot about it, resulting in a video of the eclipse that is totally black. Oops!

I still came home with a collection of still images of varying exposures from the main camera. The eye and brain form a mental image that incorporates all the elements, from the prominences to the outer corona, but rendering them in a photograph entails compromises. No photograph can capture the magic of seeing the eclipsed sun. In images with short exposures shown in the previous section, the prominences appeared natural, but only the inner corona is visible. The first image and detail were a single exposure, while the second blended two frames to control the massive flare caused by the diamond ring, which was surprisingly brief compared to 2017. To incorporate the outer corona, I tried Alan Dyer’s techniques (his image is here), compositing many exposures blended with luminosity masks, and strengthening the corona’s structure with high-pass sharpening. This resulted in a file of 3GB with 14 Photoshop layers. The longer exposures even brought two stars to the left of the sun (above). However, for this eclipse, even exposures as long as 2 seconds did not help in showing the outer corona streamers. I found that blending fewer images provided a more realistic rendering (below). Which of the two images of the corona do you prefer?

As I anticipated, my eclipse photographs of 2024 are not distinctive, and how could they have been? The 2017 eclipse demonstrated that scores of photographers aiming telephoto lenses at the moon-obscured sun would yield countless variations of essentially the same image, differing primarily in the level of skill in their processing — of which mine is not notably high. Yet, I, like scores of others, still wanted to photograph the eclipse for myself and then share it. Here is maybe the most unique power of photography. Even if it is a poor substitute for our visual experience, a photograph serves as tangible evidence of our presence, a testament unmatched by any other medium. Were you there? I’d enjoy seeing your photos.

Grand Canyon by Raft Photography Workshop

Imagine standing next to the ancient Nankoweap Granaries, perched 500 feet above the majestic Colorado River. From this vantage point, the Grand Canyon reveals itself in all its splendor—a testament to the power of nature. As you gaze down at the fast waters below, framed by towering cliffs that have stood for millennia, you’re filled with a sense of wonder and awe. With each click of the shutter, you immortalize not just a scene, but a connection between past and present, nature and civilization.

An interactive VR 360 degrees panorama of the scene in the late afternoon can be seen here. This is only one of the extraordinary scenes you are privileged to photograph each day, as we intimately explore one of the world’s greatest natural wonders. Here are another high view, a river-level view, and a side canyon.

Despite the grandeur of the canyon when viewed from its rim, its true beating heart resides within the Colorado river. However immense the landscape, rafting along the Colorado River within the Grand Canyon offers a remarkably personal encounter where you experiencing the sheer vastness firsthand, from within its depths. You are not merely observing the canyon, you are living in it. Journeying along the river presents a captivating spectacle for the eyes. Each curve reveals fresh vistas: sunlight dancing on the canyon walls, mirrored reflections on the surface, intricate rock structures and steep cliffs meeting the water’s edge – the list goes on.

This ten-day Grand Canyon Rafting expedition workshop is unlike anything that you have experienced. You will grin from ear to ear as we navigate safely some of the world’s most famous rapids, sleeping under the stars each night by the side of the river (camping equipment provided). For ten days, you will experience the camaraderie of a wilderness expedition, away from phones, the internet, and civilization. Although you will be challenged, anyone in decent physical shape should do fine. No rafting experience is needed, as our experienced crew operates the raft, sets up camp, and prepares all the three delicious daily meals.

I can affirm that a rafting trip down the Grand Canyon is one of the most outstanding experiences to be had in America’s national parks because before I took a ten-year hiatus from leading workshops to work on my books, the last workshop I led was precisely such a trip – it produced all the photographs on this page. With Treasured Lands and Our National Monuments in best-seller territory, I am resuming workshops. To restart with a bang, I have decided to co-lead another rafting trip down the Grand Canyon in partnership with my friend Oliver Klink from May 1-12, 2025. Not only Oliver is a widely exhibited and published fine art photographer, but he is also a very experienced photography educator who has led several dozen workshops – including our previous Grand Canyon river expedition.

While a rafting trip down the Grand Canyon is always one of the greatest adventures to be had anywhere, with regular trips, photographers can be disappointed by the choice and timing of the stops and camps which cater to participants with vastly varied interests. For this trip, one of only a handful of photography workshops offered down the Grand Canyon next year, the custom itinerary has been designed with only one goal in mind: to maximize photographic potential given the constraints of floating the Colorado River, where there is no going back upstream. With a ratio of participants to instructors of 6, you benefit from individual mentoring to hone your photographic skills and leave with incredible images. The guides we have chosen have a tremendous knowledge of the place and understand our photographic priorities. You will be traveling only with fellow photographers. Each day, we explore different hidden secrets of the Grand Canyon accessible only by the river from huge caverns to sculpted slot canyons, waterfalls, reflecting pools, hanging gardens, seeps, springs, and ancient granaries, photographing at the best possible time of the day to create prized images of sight seen by few.

Waiting lists for Grand Canyon private river permits can be more than 10 years. Even guided river trips fill up fast, and our river running company asks for a commitment a year in advance.

Update April 25, 2024: the raft is full, but if you are interested, I suggest you sign up for the wait list, as we are working on adding a second raft with 5 participants. This will also guarantee that you will be among the first to get notified of a similar trip offering in the future – the earliest would be 2026, since per National Park Service regulations, for everybody except river guides, there is a limit of one river trip per calendar year.

Learn more & sign up

QT Luong chapter in “Landscape Photography – American Master Photographers on Their Art”

In 2015, the China Photographic Publishing House released the book Landscape Photography – American Master Photographers on Their Art, featuring the work of nine American photographers (in order of appearance): Art Wolfe, Charles Cramer, David Muench, Clyde Butcher, QT Luong, Tom Till, Tom Murphy, Elizabeth Carmel, and Ian Plant. Since it was about studying how each of the photographers developed their way of seeing the world and their means of artistic expression, I thought the contents would be of interest.

The now out-of-print book was written in Chinese by Chinese-American photographer David Tian, the author of four books, based on research and telephone interviews. Being of Vietnamese ancestry, I cannot read or understand Chinese, so I wondered what the book said about me and my photography.

It finally occurred to me to try automated computer translation. The software had been around for a while, but the translations from the early years were not satisfactory. I write our annual family newsletter in English. A few years ago, as a relative in France found it difficult to read, I sent her a French version generated by Google Translate, after which she complimented me on having maintained such good written French language skills. Mandarin Chinese is another ball game. Although the most widely spoken language in the world, it is the hardest language to master. This applies to computers: Google Translate produced broken English.

Each of the book’s nine chapters consists of a narrative biography, an interview with questions and answers, and a selection of images with comments by David Tian. Since I thought that my biography wouldn’t be of much interest to the readers of this blog, I will be skipping it and starting with the interview. When I tried to clean up the automated translation with Chat GPT, the re-write sometimes deviated significantly from my remembrances of the answers, which were supposed to be my words – although probably distorted by the interview process. I used the automated translation as a reference to re-write each of the answers, so they may not be a literal translation. The original chapter in Chinese, whose spreads are shown below, is available as a PDF.

Questions and Answers

David Tian: What does landscape photography mean to you?

QT Luong: Landscape photography is my vehicle for personal connections with nature, the adventures of getting to locations, the joy of immersion in landscapes, and experiencing them at the best times of the day and year. It is my way of living a creative life and inspiring others. Moreover, landscape photography enables me to advocate for environmental conservation by celebrating the land and bringing awareness of its beauty and fragility.

How did you start landscape photography?

My father was a rather serious photographer and taught me the essentials. However, my passion for photography truly ignited during my mountaineering expeditions in the early 1990s. Captivated by the stunning vistas of the mountains, I felt compelled to capture these moments through photography so that I could remember them and share them with folks at home who could not reach the high peaks of the Alps. As I moved to America in 1993, I was inspired by the country’s diverse national parks and the rich history of American landscape photography. This prompted me to delve deeper into the art form, ultimately leading me to embrace large-format photography.

What kind of education have you received?

After Ecole Polytechnique in the mid-1980s, I obtained a PhD in computer science from the University of Paris in 1992. I conducted research in image processing and artificial intelligence until 2007 when I embarked on a new path as a full-time photographer. I studied photography on my own, mostly by reading lots of books and looking at lots of photographs.

What makes a landscape photograph wonderful?

An excellent landscape photograph needs two elements. The first is composition. Composition is how the photographer approaches the subject matter, using formal elements to guide the viewer through the image. The second is what I’d loosely call atmosphere. This means conveying a sense of place and time, and also the personal experience and emotions of the photographer.

How do you analyze a scene before shooting?

When approaching a scene, I make an inventory of its visual elements and try to zero in on what visually attracts me the most. I contemplate the emotions and themes that the scene evokes. I evaluate the potential of different viewpoints and lighting conditions. By analyzing these factors, I strive to create images that resonate with viewers on an aesthetic and emotional level.

What do you want to show the world with your work?

Through my photography, I aim to showcase the beauty and diversity of the natural world and foster a deeper understanding of it. Each image, and even more so, each set of images, serves as an invitation for viewers to experience what I experienced, to explore and connect with the wonders of nature. My hope is they will be inspired to appreciate and protect our planet’s precious landscapes.

You only shoot in color. What is your favorite aspect of color photography?

While I always capture the scenes in color, I occasionally explore black-and-white photography. However, I find that color photography allows me to convey a richer, more complete, and more faithful description of the natural world. Color can also add a powerful emotional impact to any image, helping to capture the immersive experience and sense of wonder of being present in nature.

What inspired you to photograph all of America’s national parks?

My first wilderness experiences took place on the high peaks of the Alps because those were the last wild places in Europe. It was mostly glaciated mountains above the tree line. When I started to visit America’s national parks, I was drawn to their natural diversity. In terms of geography and biodiversity, they represented all the different facets of a vast continent. I wanted to exhaust every opportunity to experience that natural diversity. As a self-assigned project, I aimed to create a set of photographs that would try to do justice to their splendor.

What are your plans for landscape photography in the future?

I am continuing the project to photograph nature in America’s national parks, with the goal of publishing a book in 2016. This could be extended in the long term to other U.S. public lands or international parklands, maybe in Canada and Mexico. In parallel, I have begun to pay more attention to the cultural aspect of the national parks, the man-made constructs that differentiate them from pure wilderness and define the park experience for many visitors such as visitor centers, interpretive signs.

Images and comments

The bulk of the chapter featured images selected by the author, with comments written by him. I was amused by two geographic errors. They are understandable as the result of the author mismatching my writings available on the Internet, something easy to do if you are not familiar with locations. I normally offer to fact-check articles written about me and I am always surprised that many authors decline that step. However, with the chapter written in Chinese, this would not have been practical. Since those were not my words and the Google translation was unreadable, I used Chat GPT to rewrite it into proper English. The text below is the raw result of this process, except for a few instances where I have corrected translation mistakes.

Northern Lights and Jupiter, Gates of the Arctic National Park, Alaska, USA. Canon EOS 5D Mark II camera, 24mm lens, f/1.4 at 8 sec.

That year, Luong and his friends had planned a trip to Alaska to photograph the eagerly anticipated Northern Lights. Upon reaching Gates of the Arctic National Park, they consulted with the park ranger and discovered that in September, during the third and fourth weeks, the river would still be flowing, and the night sky would be dark (unlike the bright Arctic nights of summer). However, during the third week, there would be a bright moon at night, so they opted for the fourth week for their photography expedition. Since there were no roads leading to the park, they had to rely on a bush plane (a type of aircraft capable of taking off and landing in the wilderness without designated airstrips). Unfortunately, the weather took an unexpected turn in late September, and the pilots couldn’t guarantee a safe return. Consequently, they made the decision to paddle down the Koyukuk River for their journey back from the North Fork. “It was nearly winter in Alaska by then, and traversing the waterways was incredibly challenging,” Luong reminisced. “But amidst the rugged mountains, flowing waters, snow-covered terrain, and a stroke of luck, perhaps I would have the opportunity to capture some truly unique photographs.”

Buck Dam, willow trees, rocks and reflections, Joshua Tree National Park, California, USA. Canon EOS-1Ds Mark II camera, 100-400mm lens, f/11 at 1/30 sec.

With a plethora of famous national parks, many of the more remote and inaccessible locations often remain unphotographed. Luong, however, harbors a desire to explore these less-traveled places. While most photographers flock to Joshua Tree National Park to capture the iconic Joshua trees, cholla cacti, and unique rock formations, Luong remains determined to seek out new perspectives. Understanding the transient nature of landscapes, Luong focuses on capturing fleeting moments bathed in light. In one of his works, he seized the brief moment when the morning light cast its glow upon the water plants, creating a stark contrast against the dark rocks and water surface. This interplay of light and shadow infuses the image with a vibrant energy, showcasing Luong’s dedication to uncovering the unseen beauty of the natural world.

Yosemite Valley illuminated by sunset, Yosemite National Park, California, USA. Canham KBC 5X7 camera, 210mm lens, f/22 at 1/4 sec., Fuji Astia 100 film.

This renowned work by Luong epitomizes his unwavering pursuit of capturing the true essence of Yosemite Valley. Reflecting on his experience, Luong remarked, “No matter how extensively I explore, I cannot find a better location to truly encapsulate the beauty of Yosemite Valley.” He acknowledged the footsteps of Ansel Adams, a legendary photographer who frequented the area for his own captures. Luong vividly recalled a particular evening when he witnessed fog settling into the valley with a distinct opening on the horizon. Seizing the moment, he hastened to the scene and captured the rare spectacle, considering it a stroke of luck. For Luong, color plays a pivotal role in crafting the atmosphere of his compositions. He noted, “The granite walls exude a gray hue, accentuating the vibrant color contrast during sunset, when the golden-orange rays illuminate the cliff tops, starkly juxtaposed against the blue backdrop of the valley.” He emphasized the significance of fog in brightening the otherwise dark valley, enhancing the prominence of its blue tones and elevating the overall visual impact of the scene.

Yosemite Valley illuminated by sunset, Yosemite National Park, California, USA. Canon EOS-1Ds Mark II camera, 70-300mm lens, f/11 at 1/15 sec.

After exploring numerous national parks, Luong came to the realization that Yosemite held a magical allure, captivating not only climbers but also inspiring artists. Enthralled by its charm, he made it a ritual to return year after year. Despite the wealth of excellent works by talented photographers who came before him, Luong viewed this as an opportunity rather than a hindrance. He saw it as a benchmark against which to gauge and improve his own creations, constantly striving to innovate. In this photography haven, he believed that “often a new picture is just a few steps away.” While traditional American western landscape works often feature characters standing upright next to cliffs, gazing ahead, Luong’s approach diverges. In his work, the camera is positioned farther from the person, rendering them as small figures in the frame. Rather than serving as mere focal points, these characters serve to scale the landscape, effectively emphasizing the valley’s majestic beauty.

Indian Stone Arch and Milky Way, Yosemite National Park, California, USA. Canon EOS 5D Mark II camera, 15mm lens, f/2.8 at 60 sec.

For a photographer deeply immersed in artificial intelligence and computer image processing research, the perception of three-dimensional space within images and its correlation with two-dimensional compositions is akin to the principles governing geometry and spatial processing in computer image manipulation. This expertise serves as a valuable asset in his landscape photography endeavors. In this particular image, the photographer capitalizes on his understanding of the varying brightness of the night sky, spanning from the western horizon to directly overhead, to craft a sense of curvature in the sky. Combined with the stark contrast between the Milky Way and the dark stone arch, he ingeniously infuses the scene with an additional layer of spatial depth, enhancing the overall aesthetic appeal.

Crater Lake illuminated by sunset, Crater Lake National Park, Oregon, USA. Canham KBC 5X7 camera, 110mm lens, f/32 at 12 sec., Fuji Astia 100 film.

Luong emphasizes that landscape works should have a strong atmosphere, and he also understands that color plays an important role in rendering the atmosphere. In this photo of Lake Crater he took in winter, the atmosphere comes largely from the gorgeous clouds, the lake surface, and the pine trees and plots in the foreground, creating a color contrast against the snow. He also prominently expresses beauty in his works, “because I think the appreciation of beauty can rejuvenate our spirit and enhance our appreciation of richness and diversity. Recognition and respect for the colorful natural and cultural world.”

Starry sky and sedges illuminated by lightning, Everglades National Park, Florida, USA. Canon EOS 5D Mark III camera, Nikon 14-24mm lens, f/2.8, 30 sec.

This ambitious project to photograph all of America’s national parks was entirely conceived and completed by Luong himself, at his own expense. “This frees my creations from commercial demands and completely relies on my personal vision,” he explained. Leveraging the flexible photosensitive components in today’s digital cameras, with variable light sensitivity, Luong seamlessly combines elements such as stars, drifting clouds, and thunderstorms in the night sky with vivid details of the green grass in the foreground. This achievement, traditionally challenging in large-scale photography, is made possible through the advancements in digital technology, a feat difficult to achieve with reversal film. Through Luong’s digital and film works, it becomes evident that the evolution of science and technology not only revolutionizes photographers’ creative methods but also reshapes their perspectives and worldview. The sharp contrast between his works showcases how technological advancements are not merely altering the tools available to photographers but also influencing their creative ideas and perception of the world.

Sunlight through the mountains, Chamonix, France. Canham KBC 5X7 camera, 210mm lens with GND filter, f/22 at 1/2 sec., Fuji Velvia 50 film.

“I was originally a city kid who grew up as a scientist in France. More than 20 years ago, the call of the Alps changed my life,” reminisced Luong. Despite the Alps being in close proximity to worldly civilization, in his eyes, it represented another world entirely. His journey into photography began as a hobby rooted in mountain climbing, gradually shifting from climbing for the sake of ascent to climbing for the purpose of photography. Concurrently, his passion for landscape photography burgeoned, extending beyond a mere interest in mountaineering. This trajectory mirrors that of the late renowned American landscape photographer Galen Rowell. Undoubtedly, man is shaped by the earth, and the landscapes we inhabit influence the formation of our thoughts and ideas.

Translucent icebergs at dawn, Glacier Bay National Park, Alaska, USA. Canham KBC 5X7 camera, 110mm lens, f/32 at 15 sec., Fuji Velvia 50 film.

To capture immersive and poignant scenes at Glacier Bay National Park, Luong dedicated himself to learning kayaking in Santa Cruz, California. Since there were no land routes to the park, Luong and his wife embarked on an adventurous journey. They first flew to an Alaskan Eskimo village and then navigated by kayak along the Kobuk River to Glacier Bay, maneuvering through the majestic icebergs. Luong’s profound passion for nature photography stems from his belief that photography allows him to immerse himself in the natural world. He also deeply understands that love for nature arises from genuine comprehension and personal experiences.

Mossy maple trees in the Hoh rainforest, Olympic National Park, Washington State, USA. Canham KBC 5X7 camera, 210mm lens, f/45, 10 sec., Fuji Astia 100 film.

“When I had to curtail my mountaineering activities due to health reasons, I felt compelled to acquire other wilderness skills to navigate this new chapter,” reflected Luong. Embarking on the solitary journey of photographing all the US National Parks proved to be a fitting pursuit. As he traversed the diverse landscapes of these parks, he discovered that each location sparked distinct emotions within him, fostering a yearning for understanding and exploration. “Every unique place holds its own allure,” he mused, “and I am drawn to unraveling its mysteries.” Indeed, the connection between humanity and nature is profound; as we emerge from the natural world, we are inevitably drawn back to it. Every plant, tree, mountain, and body of water in nature carries its own resonance, shaping our thoughts and emotions in profound ways.

Cracked playa at sunrise, Black Rock Desert, Nevada, USA. Canham KBC 5X7 camera, 110mm lens, f/22, 1 sec., Fuji Velvia 50 film.

Luong believes that the 5×7 format is most suitable for landscape photography compared to the larger 8×10 format. This preference stems from the fact that the 5×7 camera is lighter and more portable, yet still offers a large enough film size to capture intricate details that evoke his visual memory of each moment. Working with a 5×7 camera requires a slower, more deliberate approach, with each scene meticulously composed and photographed multiple times. This thoughtful method of working allows him to create photographs that convey rich visual content with precision. Using a 110mm wide-angle lens specifically designed for the 5×7 format, Luong can capture expansive scenery within the frame, providing viewers with a sense of immersion as if they were actually present at the scene. In this particular work, the cracks in the land are depicted from foreground to background, accentuating both the depth of field and the textural intricacies of the flat landscape.

Thunder and lightning, Big Bend National Park, Texas, USA. Canon EOS 3 camera, 28-135mm lens, f/4, 15 sec., Fuji Velvia 50 film.

“While traveling, I dedicate a significant portion of my time to scouting locations. I prefer to embark on multiple short trips to a particular area, allowing me to observe its conditions across various seasons and weather patterns,” explained QT Luong. “Through extensive exploration, I’ve come to realize the importance of selecting subjects based on prevailing weather conditions, rather than fixating on a predetermined subject and waiting for ideal conditions to materialize. This approach ensures that I always have subjects ready to photograph.” Luong shared with his colleagues that experiencing a place in different seasons offers entirely distinct perspectives, likening it to visiting a completely different park altogether. This diversity provides him with the opportunity to capture a wide array of images, each imbued with its own unique essence and character.

My Quest for the Ultimate Tripod

My tripod survey mentioned that the quest for the ultimate tripod was still ongoing. I convinced myself that my next general-purpose tripod could be, finally, the last one I bought. With that in mind, I removed the budget as a consideration and set up to look for the perfect tripod. Read on to see which tripod I chose, and more importantly, why.

Induro CLT203, RRS TVC-24L, RSS TFC-33, Gitzo 325

Feature requirements

Horses for course. There is no perfect tripod for every photographer and every situation. Knowing that in some travel and outdoor contexts I will have to compromise for a lighter or smaller tripod (if any at all), I looked for one that would work best for me when carrying a full-size tripod is feasible, which is most of the time. Personal preferences vary, but having used a lot of different tripods, I have a good idea of the features I wanted. The following are easy to assess:
  • No center column. Having owned tripods with and without a center column, I’ve occasionally found the column useful for a quick adjustment or to reach more height, but those situations are rare enough that I prefer the weight savings, lower minimum height, simplicity, and higher rigidity of a tripod without a center column. A small, but significant advantage of tripods without a center column is that they are easier to carry by hand when folded because there is a space between the legs for your fingers.
  • Three leg sections. Having owned both three-section and four-section tripods, I have developed a strong preference for the three-section tripods: faster to set up and fold, and higher rigidity. Compactness matters only in urban settings.
  • Eye-level height. I am 5’11” (70″ or 1.8 m) tall. To be able to look into the viewfinder while standing straight, I need a tripod at least 58″ tall. Except for the series 3 Gitzo, all the full-size tripods I have owned reach about 52-54″. Even after adding the height of the ballhead, this required me to stoop down a little when using the tripod at full extension. While this sounds like a minor inconvenience, if I spend a lot of time composing, the discomfort adds up to my posture problem, and aging has not improved matters.
No less important, but more subjective:
  • Smooth operation. This means how easy it is to lock and unlock the legs, slide the legs in and out, and adjust the leg angle.
  • Stiffness. The tripod has to hold a camera steadily and produce a sharp picture with long exposures even in windy conditions – not a given even with a good-quality tripod. This is subjective because no tripod will work in gale-force winds, so it is a question of “how good is good enough”.
  • Lightest possible weight given the previous requirements.

Narrowing the choice

Thirty years ago, it was next to impossible to find tripods below series 3 without a center column. Fortunately now one can choose from several manufacturers. Because of my previous experience, I eliminated Feisol. FLM CP30-L4 II and CP34-L4 II tripods looked promising, but unfortunately, they have four sections, and if used as three-section tripods (with the last section retracted) reach only 51.5″. In addition, their stiffness is slightly subpar. Likewise, Gitzo doesn’t have a series 2 without a center column, and I had reservations about the Gitzos I owned. This left two main contenders, Really Right Stuff (RSS) and Pro Media Gear (PMG). Both are family-owned companies that manufacture their tripods in the USA to exacting standards. They charge premium prices that in the past had deterred me because of my unfortunate tendency to damage or lose tripods. With a much more extensive product line, RSS is much better known, but as a result, I am prejudiced against them because of the owner’s politics. In addition, PMG was more responsive to queries.

RRS offers a full range of tripods from series 1 to series 5. Many consider them to be the best in the business. Examining the tripods quickly shows why. Besides impeccable build and operation, they feature a leg diameter larger than any other tripods of the same class. For instance, the series 2 RSS TVC-23 leg diameters of the top section are 33mm as compared to 28mm for a Gitzo series 2 and 32mm for a Gitzo series 3. By the way, in case you are wondering about the word “series”, initially series 2 referred to a tripod having a top leg diameter in the 20-29mm range, series 3 in the 30-39mm range, etc… If one ascribes a cross-manufacturer significance to this nomenclature, it could be argued that RSS labeling of their tripods is an anomaly. It also helps that RRS was the first to offer tripods of series 2 and smaller without a center column and chose a wide leg angle spread – more on this point later. The best series 2 tripod is probably the RSS TVC-23 which extends to 52″ and would be perfect for someone about 5’4″. But for someone taller, any series 2 tripods with three sections and no center column do not quite reach eye level. The TVC-24L needs all four sections to reach eye level and isn’t all that light or stiff.

RSS TFC-33 and TVC-24L tripods

Series 3 options

This led me to series 3 tripods, which are offered by both RSS and PMG. Both manufacturers offer short legs (RRS TVC-33S, PMG TR343) and full-size legs (RRS TVC-33, PMG TR343L), the latter extending to comparable heights of 58.4″ and 59.3″. In addition, there is the choice of two different apexes. The apex, also called the spider, is the part that holds the legs together. The wider apex is modular since its central plate can be removed to accommodate a center column, a leveling head, or a video bowl. Its width provides a larger base suitable for larger heads and adds stability because the pivot point of the legs is higher. The compact apex is lighter and results in a smaller folded diameter for the tripod.

RRS wide-apex tripods are prefixed as “TVC”, while their compact apex series are prefixed as “TFC”. RSS lists the TVC-33 at 1890g and the TFC-33 at 1690g – I measured 1735g on my scale. PMG prefixes their wide-apex tripods TR and their compact apex tripods TRS. Some configurations do not have a compact apex offering, but to convert the relevant tripods from wide apex to compact apex or vice-versa, you can buy directly from their website the other apex and swap it in fifteen minutes. Although they don’t list them, RRS can also sell you an apex. The compact apexes of both brands are designed to be the most compact possible and keep the folded legs parallel. Personally, I would have preferred something slightly larger to leave just enough room for fingers between the folded legs.

PMG listed the weight of the TRS01 Compact Apex as 175g, and the T34A01 Wide Apex as 420g. This would have resulted in a weight savings of 245g, putting the weight of a TR343L with compact apex and without spikes at 1565g, less than my Induro CLT203, a series 2 tripod considerably less stiff and which doesn’t reach eye level without a center column. An easy choice! I was disappointed that the measured weights were 200g for the compact apex and 325g for the wide apex. Since the latter includes a large spirit level and a beefy hook (both removable, totaling 30g) absent in the compact apex, the real difference in weight of 1840g versus 1725g isn’t that significant.

PMG T34A01 Wide Apex and TRS01 Compact Apex

Performance and Leg angle

Procedures for quantifying the performance of camera sensors or lenses are well-established and results abundant, but the same cannot be said of tripods. David Berryrieser was the first to create a framework for testing tripods that results in repeatable measurements. He created the excellent website thecentercolumn.com to publish his methodology and results while he was a physics graduate student at Stanford University. The irony is that in the site, he explains why using a center column invariably lowers tripod performance. David’s measurements are extensive, but he summarized the performance of a tripod in terms of stiffness with a single numerical score. Here are those numbers for some tripods:

tripod                height   weight sections stiffness
                     (inches)   (lbs)
RRS TVC-33	       58.4     4.30	 3       2184	 
Gitzo GT3533LS         59.7     4.58     3       2147
PMG TR343L	       59.3	4.12     3       1783	
FLM CP34-L4 II	       68.0	4.17	 4       1393
	
RRS TVC-23	       51.9	3.37     3       1941
RRS TVC-24L	       66.1	3.97     4       1132
Gitzo GT2542           53.7	3.74	 4       1181
FLM CP30-L4 II	       68.0	3.23     4     	  792
Feisol CT-3342	       56.8	2.53     3        628

By David’s results, the RRS tripods have the best stiffness-to-weight ratio of any tripods. The PMG doesn’t perform as well as the RRS (and Gitzo), but still strong when compared to all other tripods. David notes:

I found that the leg angle has a dramatic effect on the stiffness of the tripod. The wider the stance the better. The PMG has a relatively narrow leg angle at 21.8 degrees. Compare this to 23 degrees for the Gitzo and 26 degrees for the top ranking RRS. If the PMG had a 26 degree leg angle, I estimate that the yaw stiffness would be roughly 25% better which would probably make the PMG the top performer. Its frustrating that so many manufacturers uses a narrow leg angle. I can understand the appeal, a smaller lighter, cheaper, taller tripod. But the yaw stiffness really takes a big hit for modest gains in those other categories. It is frustrating in the case of the PMG precisely because everything else about the tripod is exceptional.
The comment about the leg angle correlates with my observation about the Feisol tripod. It looks like PMG has been paying attention since they subsequently switched to a 24-degree leg angle. After completing his PhD in 2021, David moved on, but so far the framework he created remains the only available. He has not updated thecentercolumn.com or re-tested the PMG, but I trust his prediction that the revised PMG performs in the same ballpark as the RRS. With that in mind, the PMG and RRS tripods with compact apex are the lightest meeting my requirements. They are a bit heavier than my series 2 tripods, but not by that much.

Features: RRS v. PMG

If not performance, here are the differences I saw between what RSS and PMG tripods:
  • RRS has a slightly larger leg diameter (37/32/28 mm vs 34/30/26 mm) and is slightly heavier.
  • Unlike RSS and most of the competition, PMG’s leg locks are all metal and have no rubber parts. They may be more durable but less comfortable to operate, especially in cold temperatures.
  • PMG’s tripod feet include spikes (for use on outdoor soft surfaces) that when not in use are cleverly stored inside the tripod tubes by screwing them in reverse to the inside part of the feet. Removing them for weight savings (60g) leaves holes in the feet that would have to be plugged, maybe with a short 3/8-16 screw. The downside it that the feet are non-standard. Most other high end tripods, including RRS, come with a 3/8″ screw hole at the bottom of each leg that can accept a much wider choice of feet with that thread.
  • On each leg of a PMG tripod, one of the two main bolts serving as the pivot is secured in place by another smaller bolt, therefore ensuring that the main bolt will never rotate relative to the leg. That rotation of the bolt relative to the leg, and the resulting floppy legs was a major issue with one of my Gitzo tripods and a complaint I had read about RSS, so I welcome this design detail.
  • Although both are some of the most expensive tripods, PMG is slightly less expensive ($1,100 v $1,165 for the wide apex version as of this writing), especially considering that if you want spikes, RSS charges an extra $100, and that PMG periodically offers special discounts in the 5-10% range for signing up for their mailing/SMS list.
All those differences are relatively minor. Both feature top-notch construction and function. In the end, small considerations add up, and I bought the PMG. It replaces both my Induro CLT203 (which I will keep for iffy situations such as canyoneering or sea kayaking) and Gitzo 325. Currently, all my older tripods require me to pull out the legs to set them up. With the PMG, if I just unlock the leg locks after holding the tripod up, the legs extend themselves by gravity. It will be interesting to see how long the operation remains this smooth. I expect this to be my last tripod article but will update it to report if the PMG TR343L holds up to be the ultimate tripod.

PMG TR-343L with wide apex and compact apex

Landscapes where I Live, in Monochrome

At last, I am releasing a body of work featuring landscape photographs made where I live, which means within half an hour from home. And if that wasn’t enough of a change in the practice of someone known for large-format photography of national parks and other public lands all around the country – itself a subset of extensive travels spanning five continents, I altered my photography process and then chose to present the images in black and white.

The continuity with my work in parklands is that, as briefly announced before, I made each of the new photographs while hiking within a local park or preserve. Galen Rowell had remarked in Bay Area Wild (reviewed here) that the Bay Area’s greenbelt rivals that of the country of Costa Rica, a much-touted eco-travel destination. Although only a small slice of the Bay Area’s diversity, I am fortunate to be able to access more than twenty nature parks within a half-an-hour drive from my home in San Jose, California. Over the past year and a half, we visited those oakland and chaparral habitats more than sixty times. On this page, I am showing twenty-five photographs, like on a short roll of film with the extra leader shot. They are from nineteen of the local parks, approximately from north to south:

  • Mission Peak Regional Preserve,
  • Ed Levin County Park,
  • Rancho San Antonio County Park,
  • Stevens Creek County Park,
  • Fremont Older Preserve,
  • Lexington Reservoir County Park,
  • Heintz Open Space,
  • Santa Rosa Open Space,
  • Sierra Vista Open Space Preserve,
  • Alum Rock Park,
  • Joseph Grant County Park,
  • Almaden Quicksilver County Park,
  • Santa Teresa County Park,
  • Calero County Park,
  • Canada del Oro Open Space Preserve,
  • Coyote Valley Open Space Preserve,
  • Coyote Ridge Open Space Preserve,
  • Coyote Lake Harvey Bear Ranch County Park,
  • Uvas Canyon County Park.

The Process

With the sole exception of the San Jose city skyline captured at dusk with the 100-400 lens on a tripod from Rancho San Antonio County Park, I made all photographs with the trusty 24-105 lens handheld, and more or less at midday.

Why midday? I made the photographs during family hikes, generally of about five miles, where the main purpose is having a good time exercising in nature. Initially, when it was only my wife and me, sometimes we went in the afternoon aiming to be at home before dinner time. Last year we were joined by two of my wife’s sisters. Although they prefer mornings, this group of night owls doesn’t care for sunrises, as early winter mornings are chilly, while in the summer the sun rises way too early. Anyway, unlike national parks, city and county parks are not open around the clock, and for most of the year, the sun is quite high in the sky when they officially open in the morning. As the saying goes, when life gives you lemons, make lemonade. For a long time, I have embraced the challenge of photographing at midday, even in the places that would appear less conducive to this approach. There is value for one’s creative growth to try to do work in less favorable conditions.

Why handheld? During all my life, while traveling, I have often stopped the family either on the road, the street, or the trail to photograph. Those periods of time invariably felt short to me, but long to them. For the recent family hikes, I made a change, resolving not to make anybody wait for me. We sustain a brisk pace of about 2.5 miles per hour, with a picnic midway. As I never backtrack while walking, I try to anticipate possibilities before they present themselves, which is part of pre-visualization – seeing what does not yet exist. Once I walk a hundred more yards, this tree will stop merging confusingly with that valley but instead detach itself against a more uniform hillside. It is great a exercise for the mind. When the anticipated composition appears, working purely by instinct, I make only minor adjustments to its framing. Taking up large-format photography in the early 1990s changed my photography practice by forcing me to become more deliberate and contemplative. Trying to photograph the landscape quickly and with no second chances shakes up again my process. There is value for one’s creative growth to do work with self-imposed constraints, and also in trying new things. Even though I always feel that I took the picture quickly, it is surprising how much one finds themselves behind on the trail in less than a minute. I then walk faster or jog to catch up with the group. It is also a great exercise for the body.

Black and White Photography

I hesitated to present this work in black and white, a first for me although these days I sell about the same number of prints in black and white as I do in color. The primary function of a photograph is to describe what is in front of the camera, and there is no denying that a color photograph offers a more complete description of the world. Although in the Bay Area the changes brought by the seasons are more limited than elsewhere, our hills turn from electric green to golden and then brown over the course of the year. Although unspectacular our autumn foliage (autumn colors in black and white?) still adds accents, feelings, and beauty to the landscape. On the other hand, unlike in other places such as the Colorado Plateau, our landscapes are not filled with colors that one would have any difficulty imagining. Presenting the work in black and white links it to a rich tradition of landscape photography, elevating those modest scenes by emphasizing their formal and abstract qualities over our everyday perception of them.

Do you think that the monochrome photographs in this body of work are missing something? I would be grateful if you answer this single question below, and even more so if you would say why you think so in the comment section at the end of this post. As with every time there is a poll I may not comment further to avoid influencing answers.(click here if you don’t see the question below)